Complete Guide to Building Your Hotel on the Samothraki Booking Platform.
Create an account
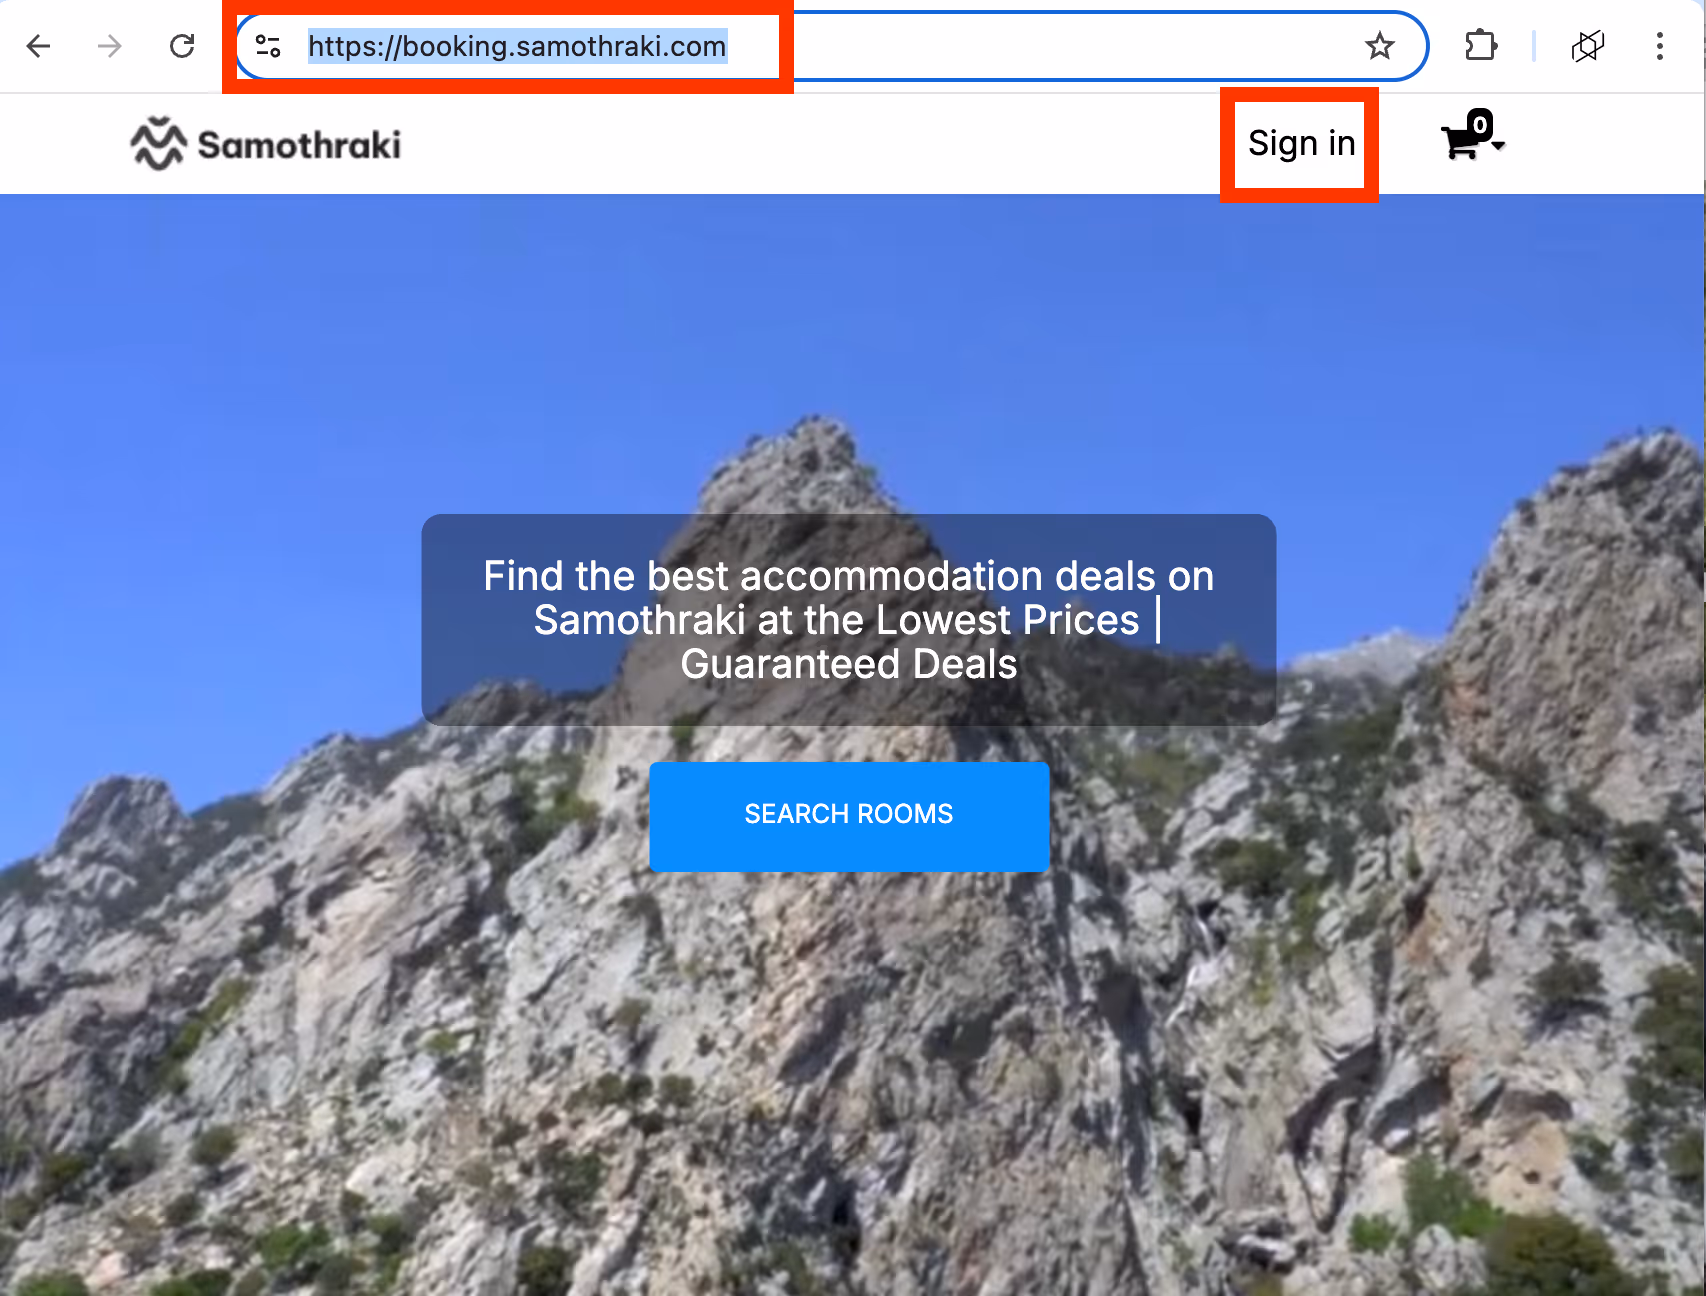
Go to https://booking.samothraki.com
On the top right click the Sign in button
Enter your email and click Create Account

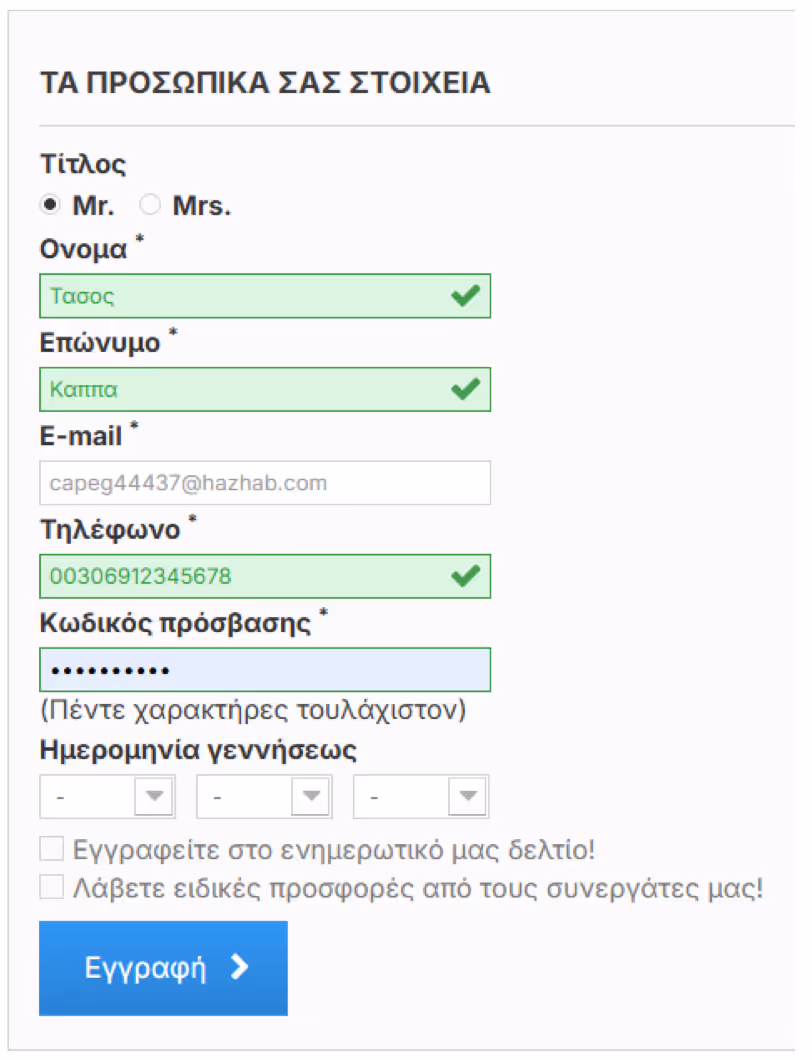
Your Personal Details
Fill in the following fields and click Register
My Account
On the My Account page, you can edit your personal details. To change your password, go to the Personal Information section
Register Your Hotel
Click the Register Your Hotel button
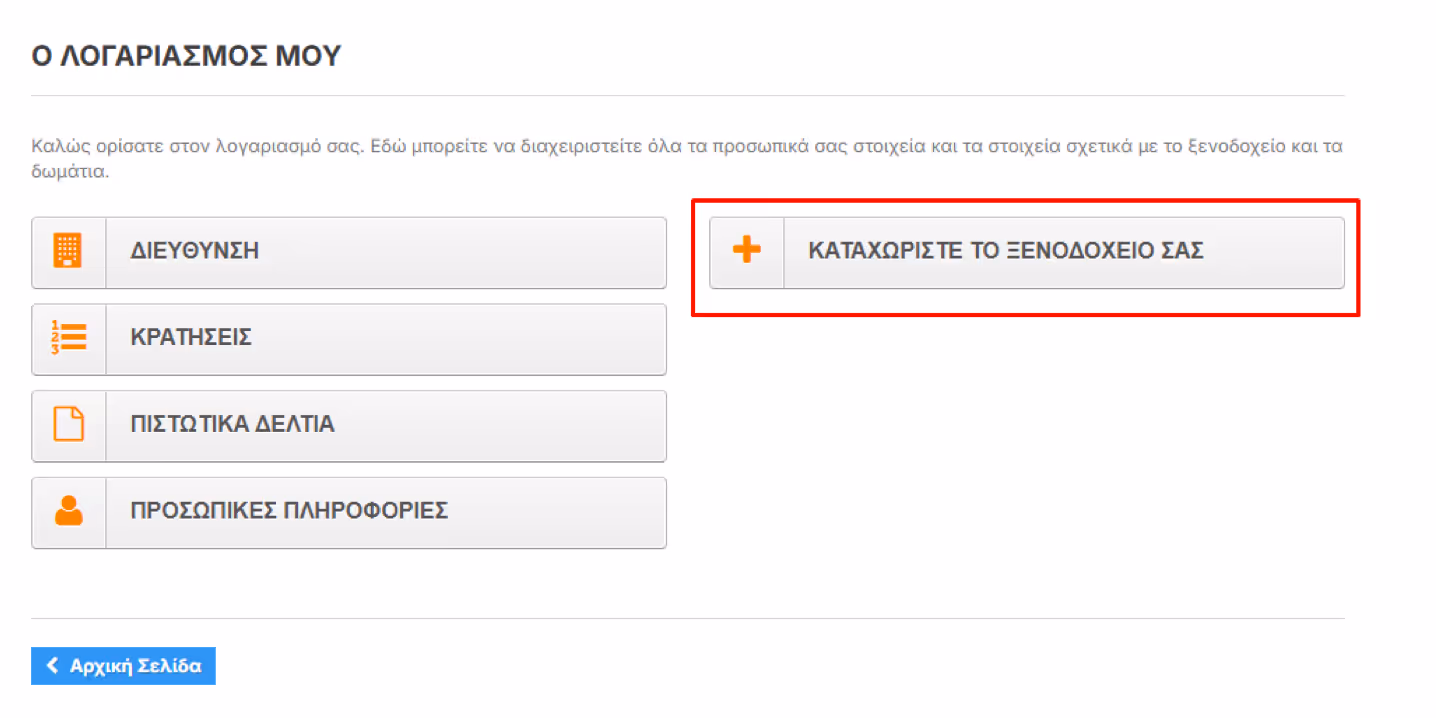
Open a New Account to Promote Your Hotel
Select Language: Change the language to update your hotel’s information in multiple languages
Default Language: This is the primary language for your hotel’s profile
Hotel Name: Enter the hotel’s name (in both Greek and English)
First Name / Last Name / Email: Already stored from your user account
Phone Number: Enter the hotel’s contact number
Fax: If applicable

Once you click Register, the following message will appear:
"Your request has been submitted to the administrator. Please wait for approval."
Account Activation
Once your account is activated, you will receive a confirmation email. This means you became a seller and that the admin approves your (seller) request.
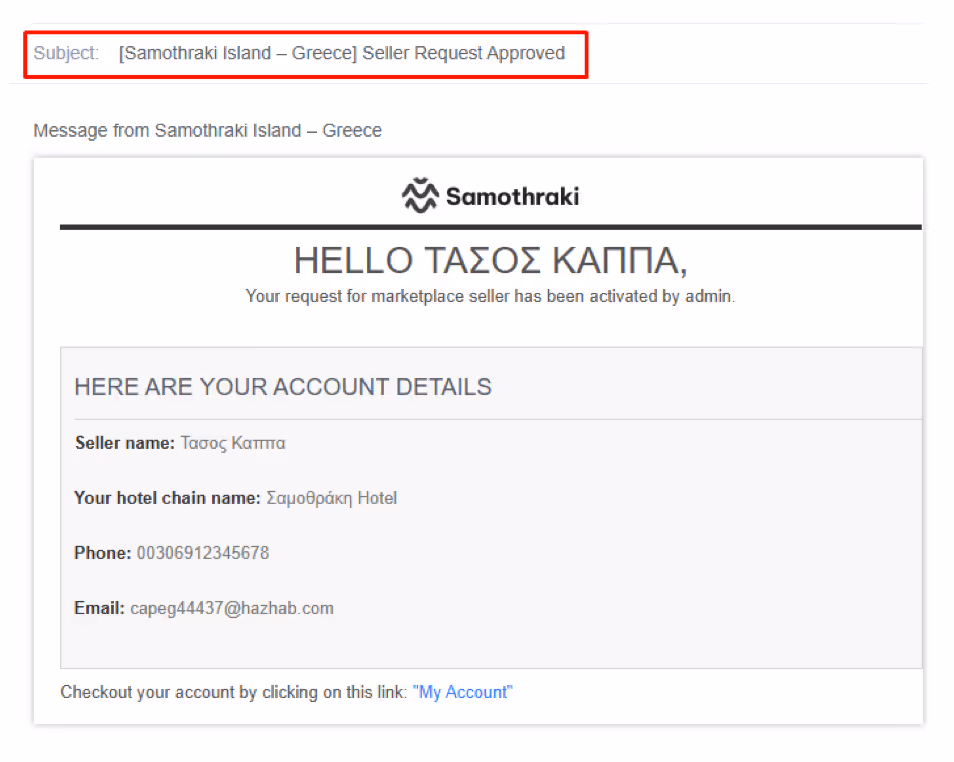
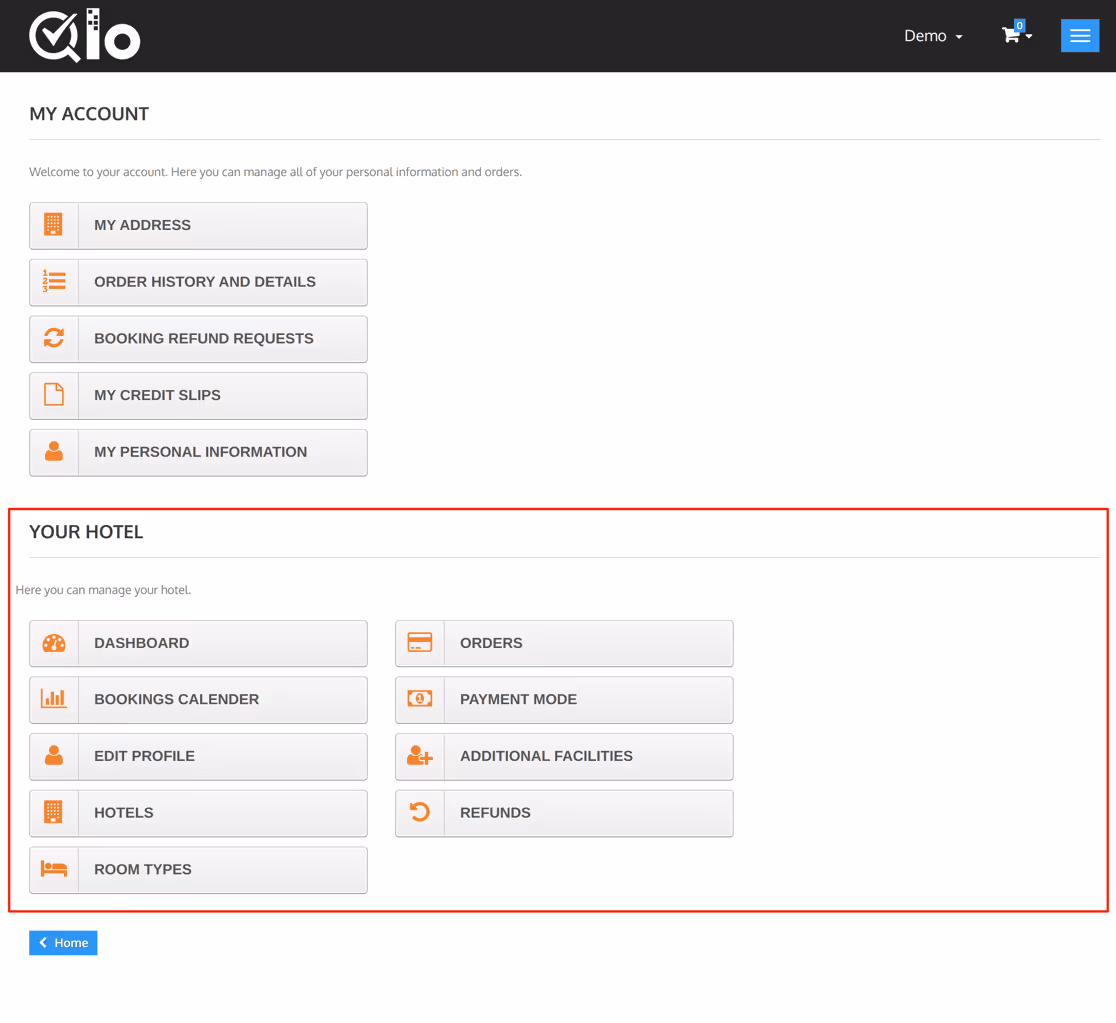
The seller can then manage their property on the marketplace using the various tabs of the marketplace available in their accounts section.
Add your payment mode
Seller Stripe Setup Procedure
Once the admin has enabled the module, it’s time for sellers to connect their Stripe accounts.
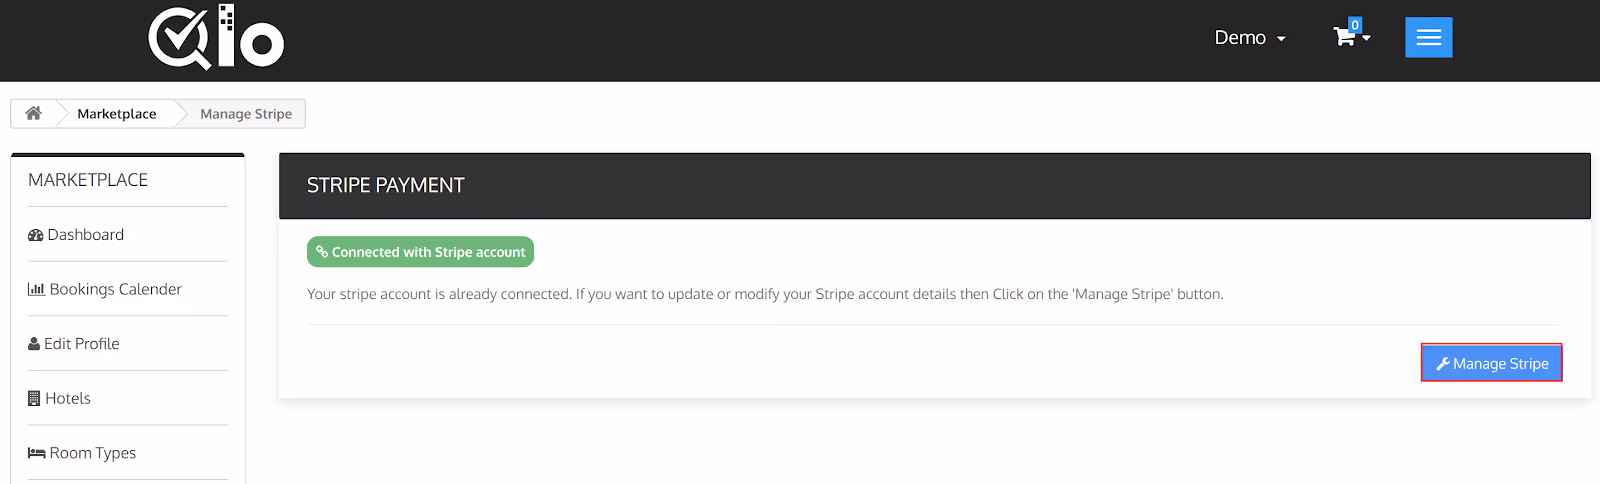
The seller can connect the Stripe account using the newly added tab of Manage Stripe in his account.

- Once the seller clicks on the manage stripe option, he can see the connect option using which he will connect his stripe account with the QloApps marketplace stripe payment gateway module.

- Once the seller clicks on connect with Stripe button, he will be redirected to the Stripe website where he will have to enter all his Stripe merchant account details.
- After the seller completes the setup process of his stripe account, he can then manage his stripe payments using the manage stripe option.
Sellers can connect their Stripe account to receive real-time payouts as soon as a guest books and pays via the QloApps Marketplace Stripe Payment Gateway..
How Do Guests Pay For Bookings Using Stripe Payment Gateway?
After the admin and seller complete the configuration process of the module, the stripe payment gateway will be added as an available mode of payment using which guest can pay for his booking order.
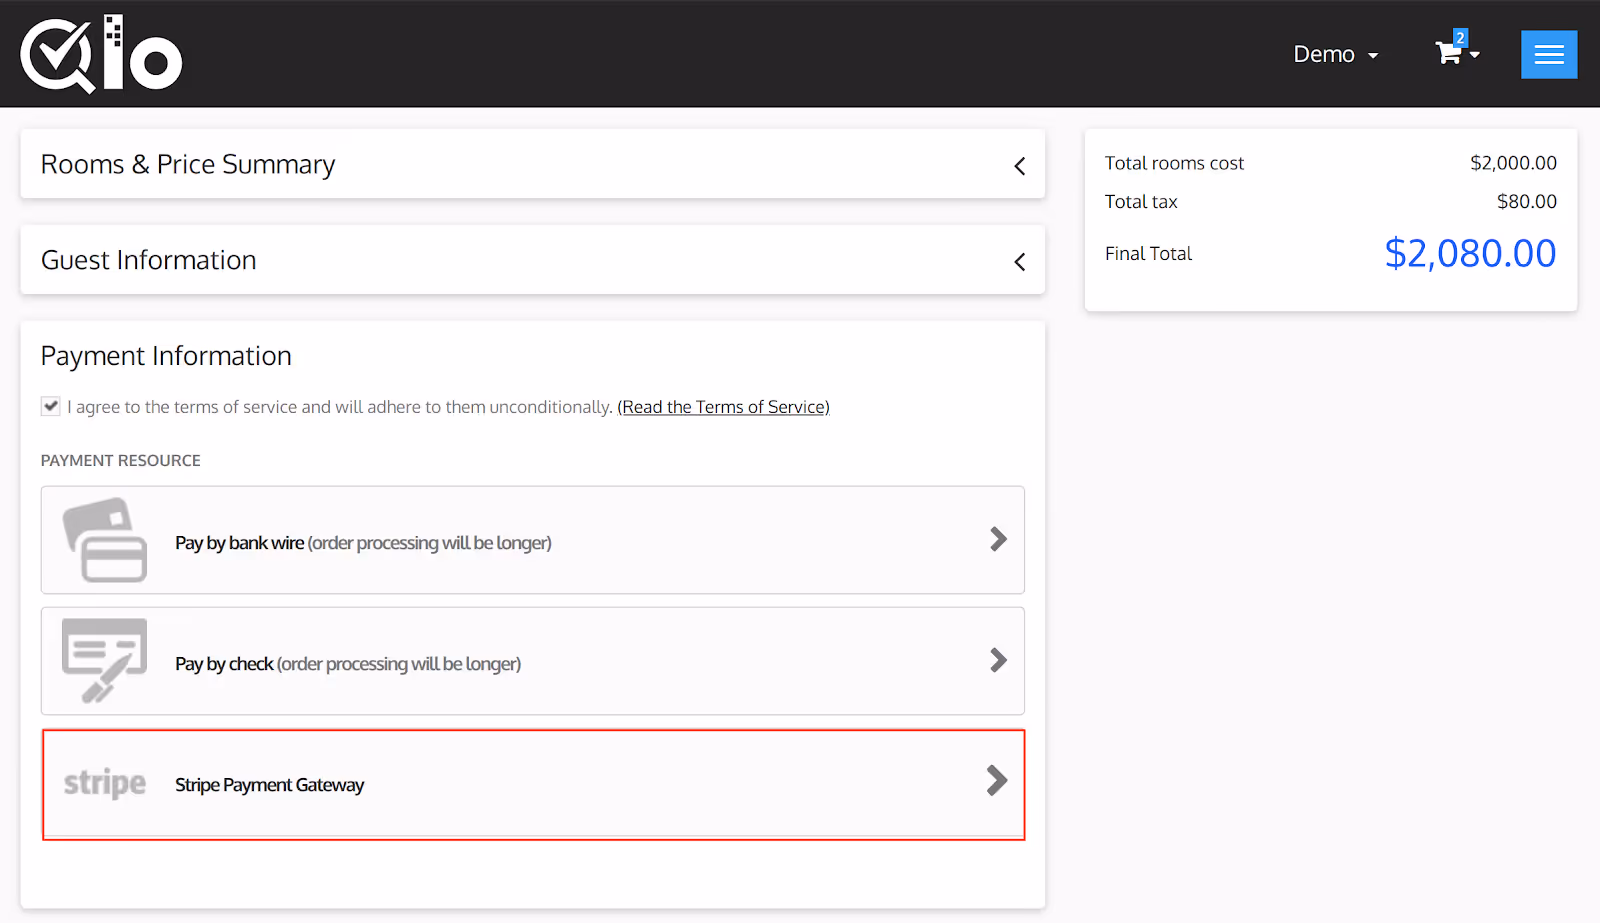
On clicking Stripe Payment Gateway, users are redirected to Stripe where they can pay via card or payment link to complete the booking process.
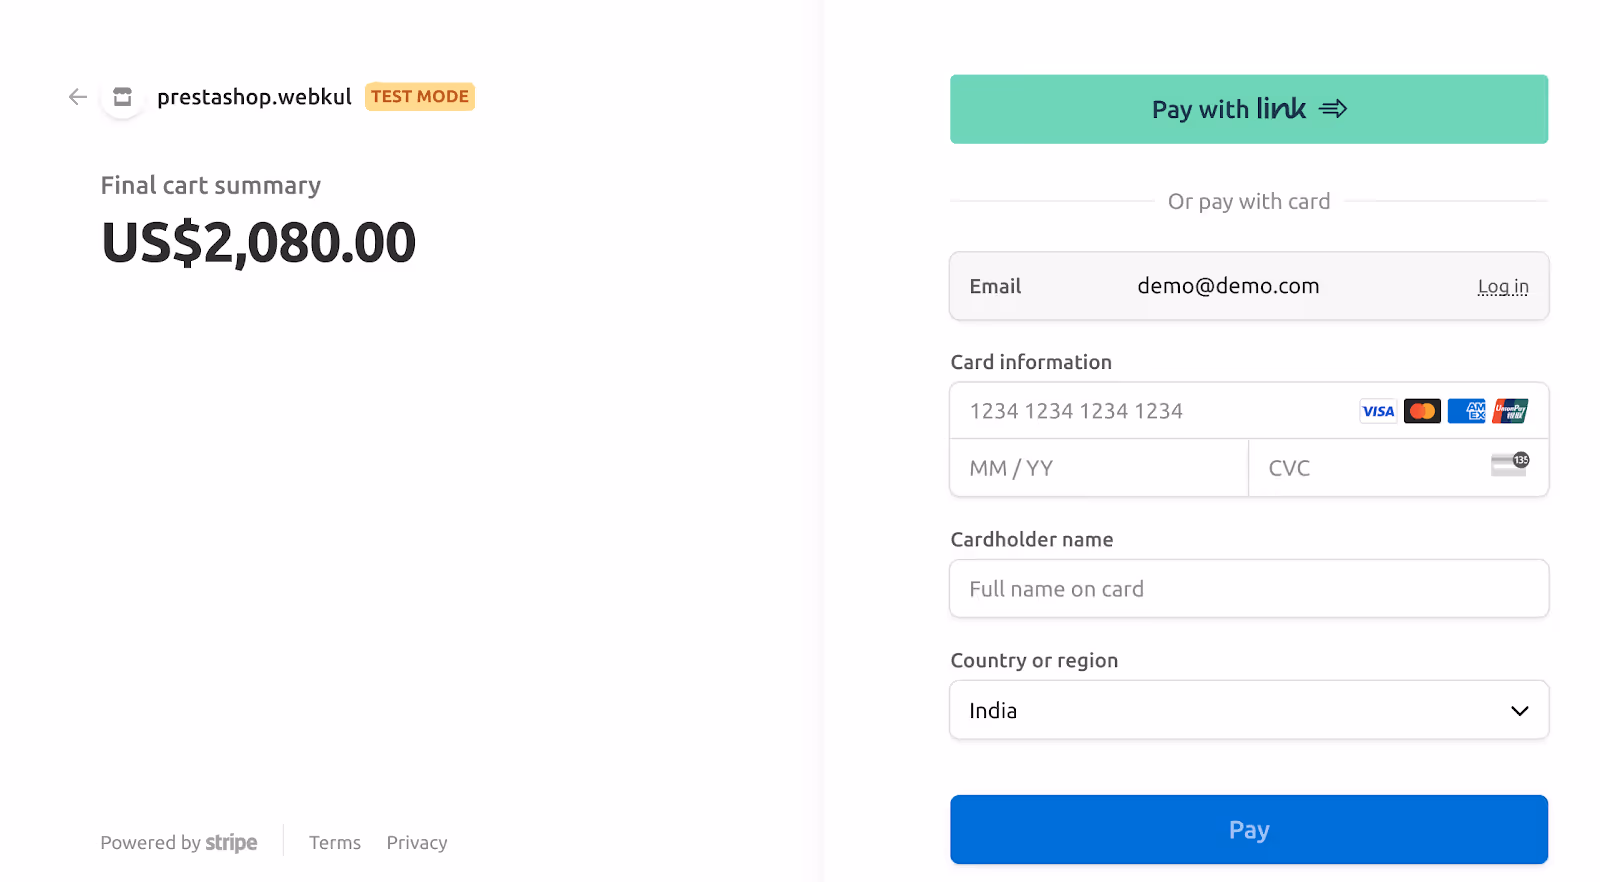
After the guest completes the payment process, the booking amount will be transferred into the admin account after which it will get split into two parts: admin commission and seller earnings.
The share of seller earnings will be transferred into the seller’s connected stripe account automatically from the admin account in real time. Thus, easing the transfer process for the admin.
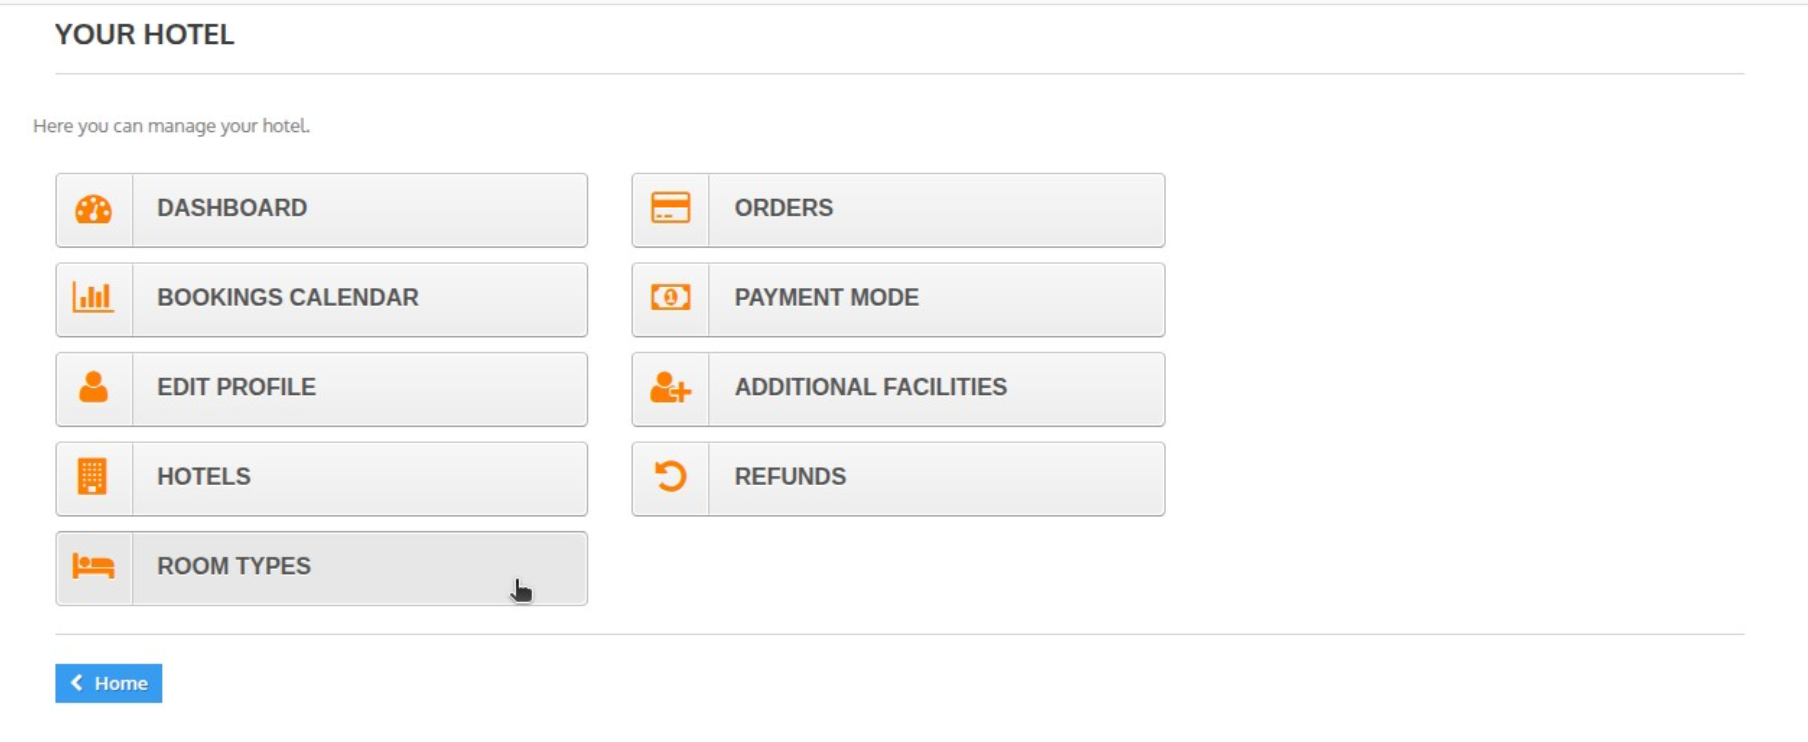
Dashboard
On the marketplace dashboard, the seller can view the daily activity of his hotel including check-ins, check-outs, new bookings, stayovers, cancelled bookings, and guests.
It also displays the stats for the hotel through which the seller can analyze the performance of his properties.
The seller can change the view mode of the dashboard as per the current or previous day, month year. Moreover, they can also filter the data that is displayed on the dashboard using the mini calendar.
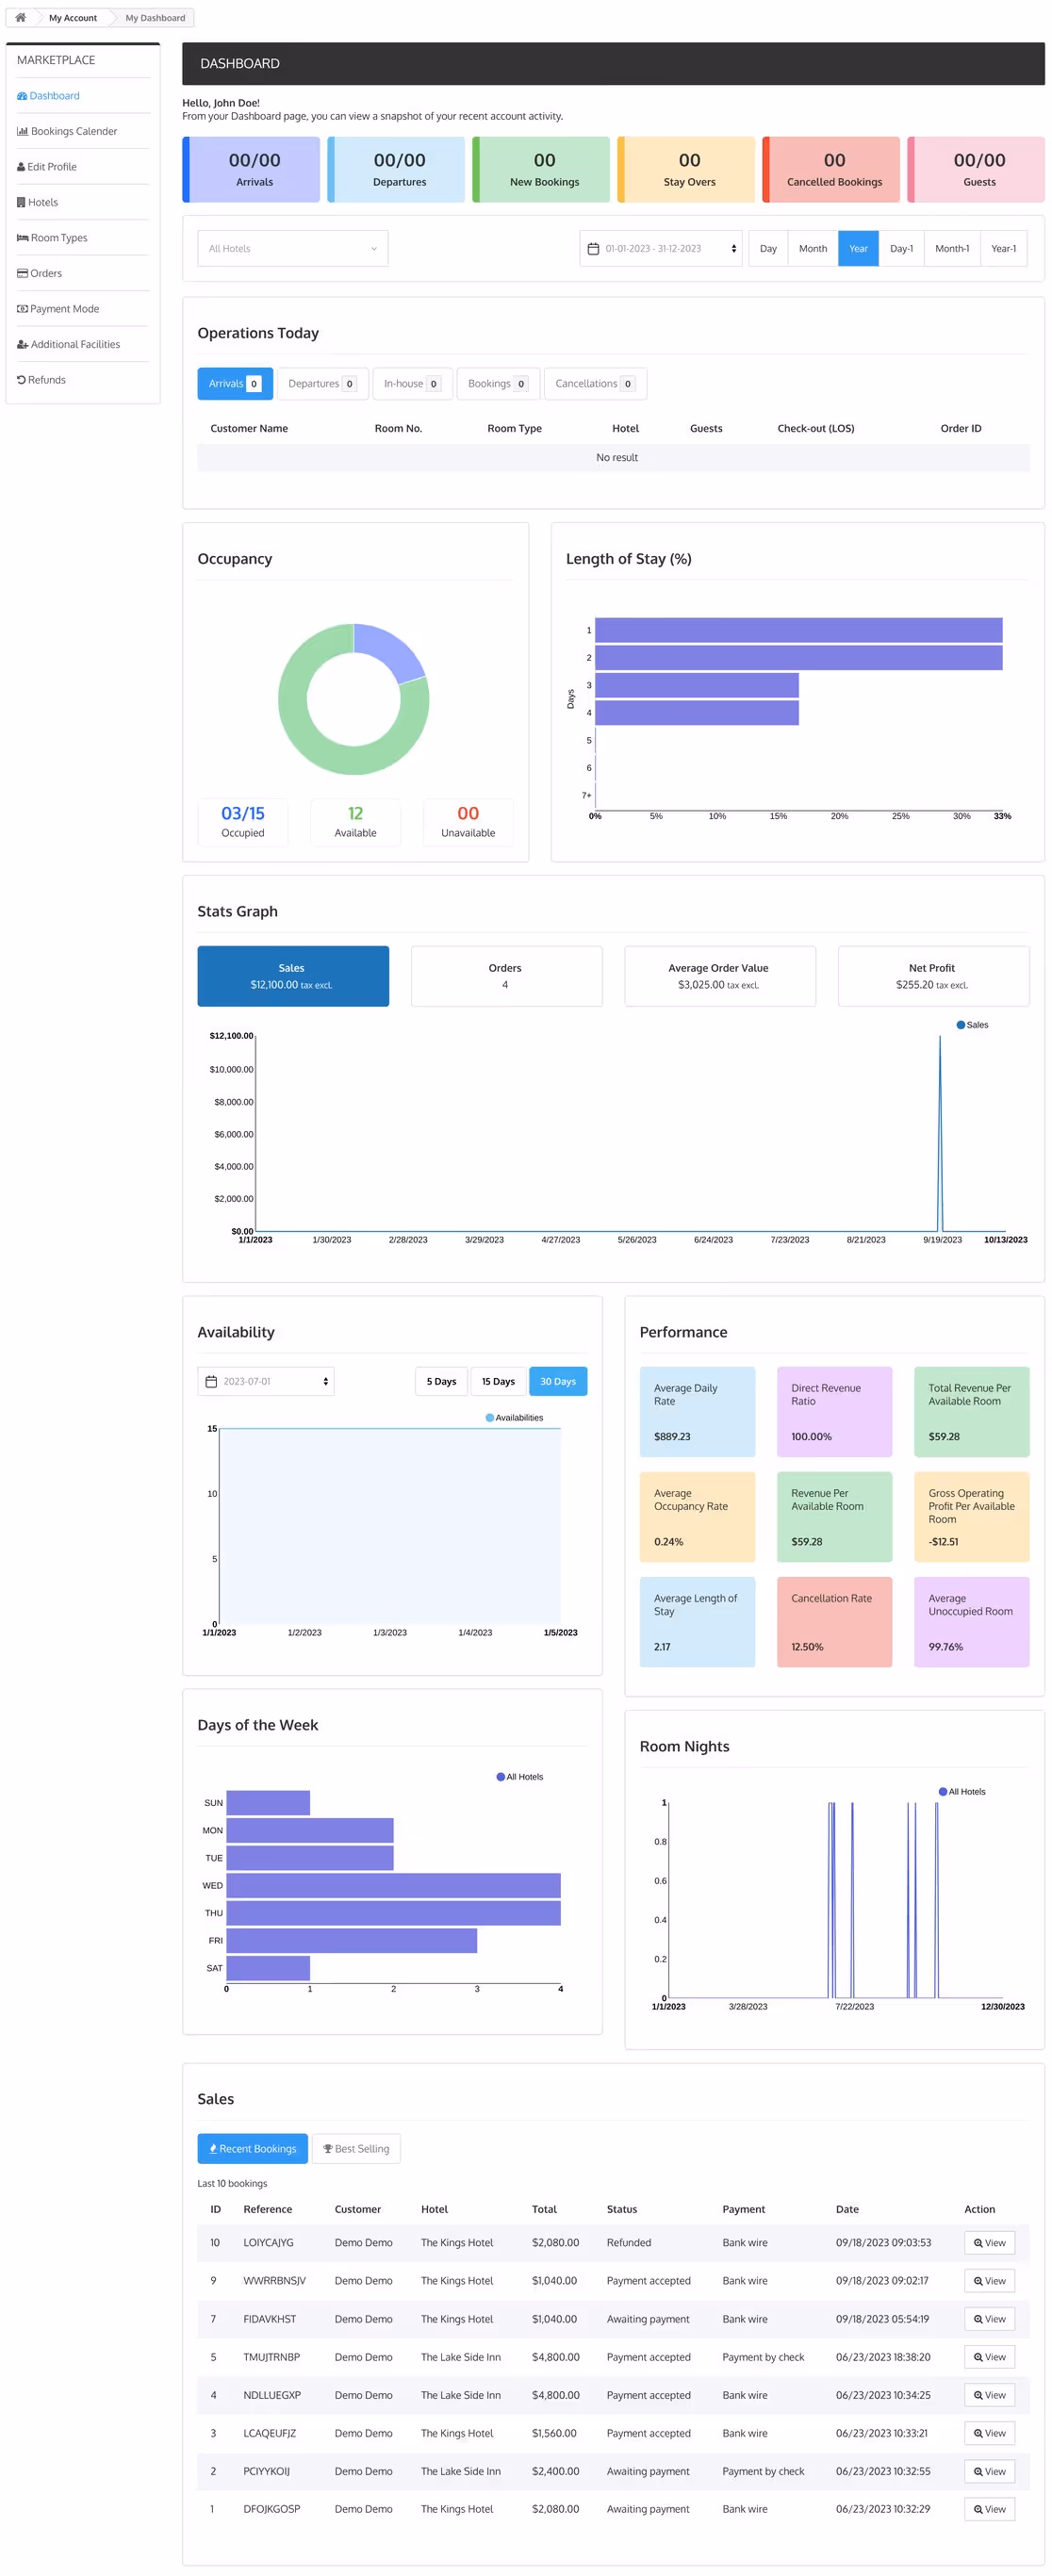
Data On Dashboard
The dashboard displays the following hotel parameters:
- Operations Today
- Occupancy
- Length of Stay
- Stats Graph: It includes data on sales, orders, average order value, and net profit.
- Availability
- Performance
- Days of week
- Room Nights
- Sales:It can toggle with “Recent Booking” and “Best Selling”
Booking Calendar
On the booking calendar tab, sellers have the option to view the occupancy status of selected room types of a particular hotel for a duration.

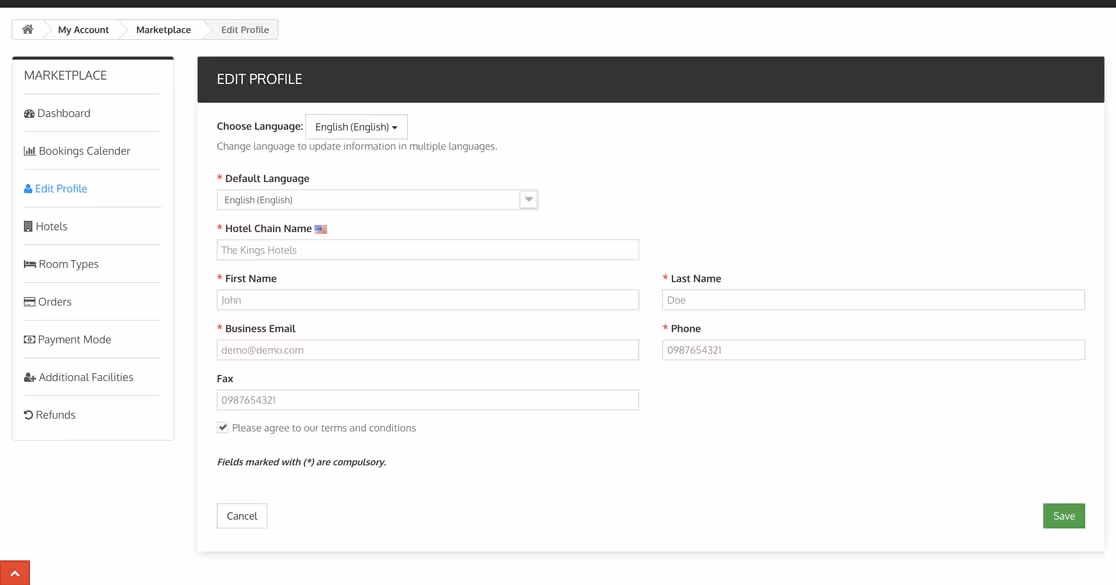
Edit Profile
In this section, Sellers can add and update their profile information that is displayed to the admin through this ‘Edit Profile’ tab.
Hotels
Using this hotels tab, the sellers can add and manage hotels in the marketplace.
To add a new hotel, the seller will click on add hotel and then fill in various fields on the hotel page.
Information Section
In this Section Seller provides basic details of the hotel.

SEO
In this Section,Seller can add SEO details that helps hotel online visibility and make it easier for people to find your hotel on search engines.

Images
In this section, sellers can add hotel images after saving the hotel information.

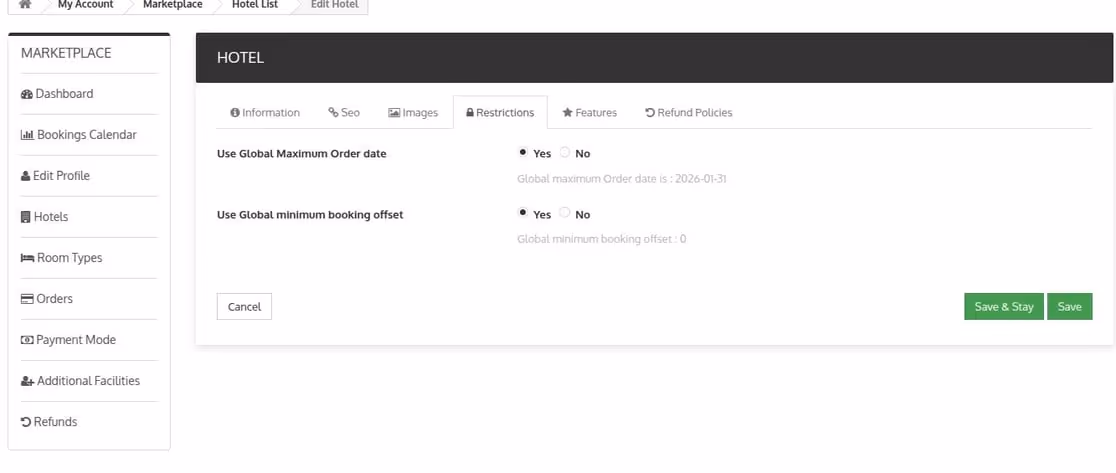
Restrictions
In this section, the seller can set the preparation time and maximum booking date restriction for the hotel.
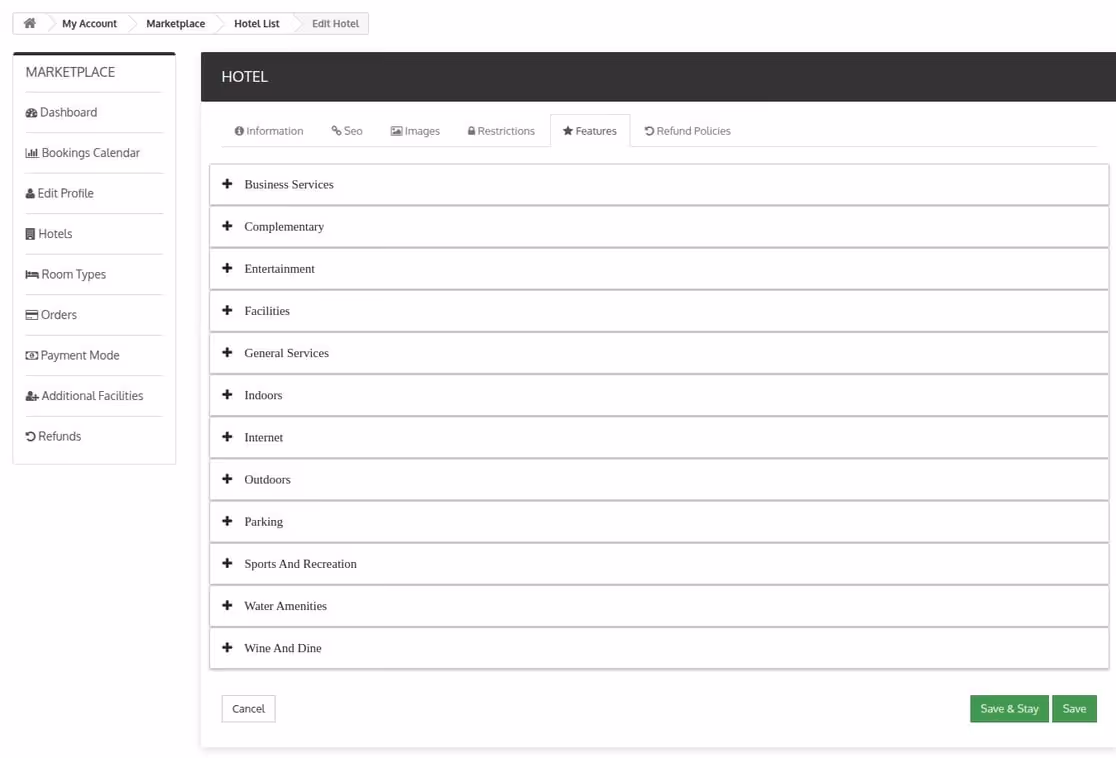
Features
In the next tab, the seller can select hotel features.
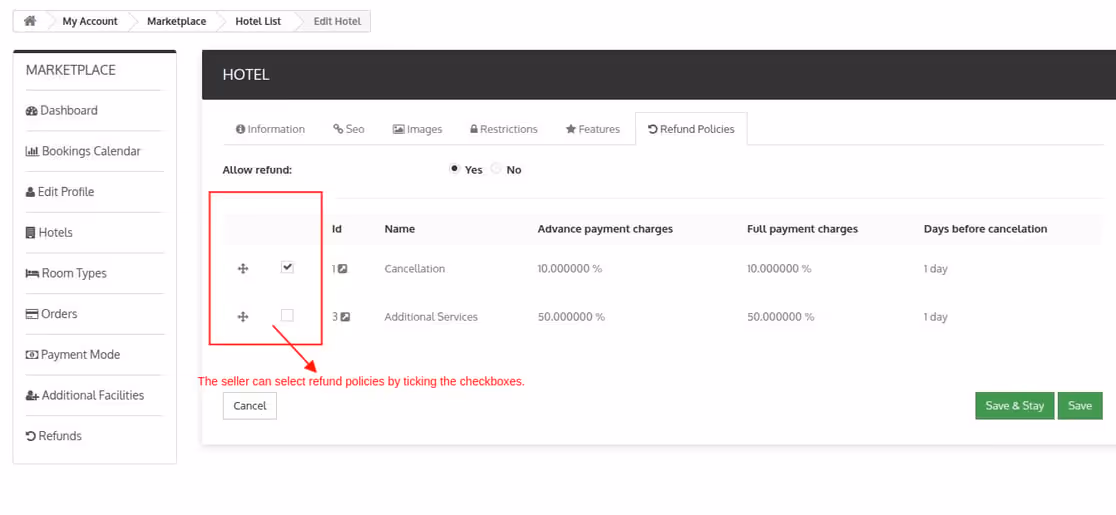
Refund Policies
In this section, the seller can enable and select the refund policies for the hotel.
Once the hotel is created by sellers the request is sent to Admin. Then, the admin can approve or disapprove the hotel from the back end.
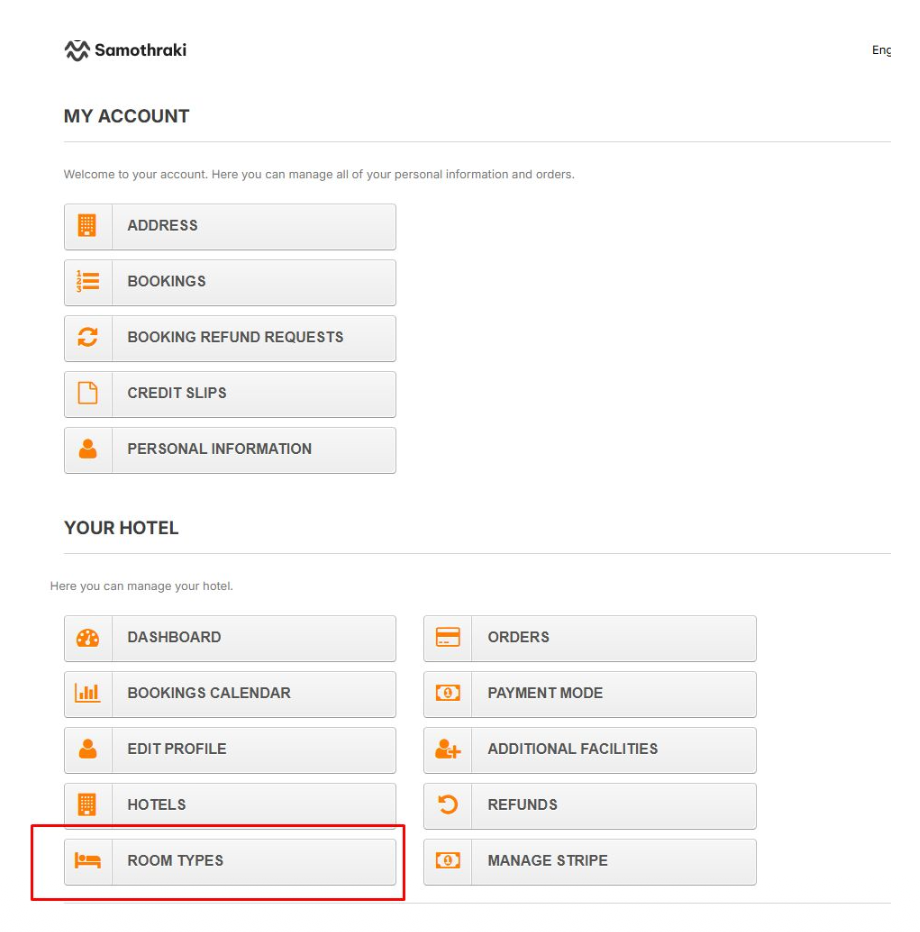
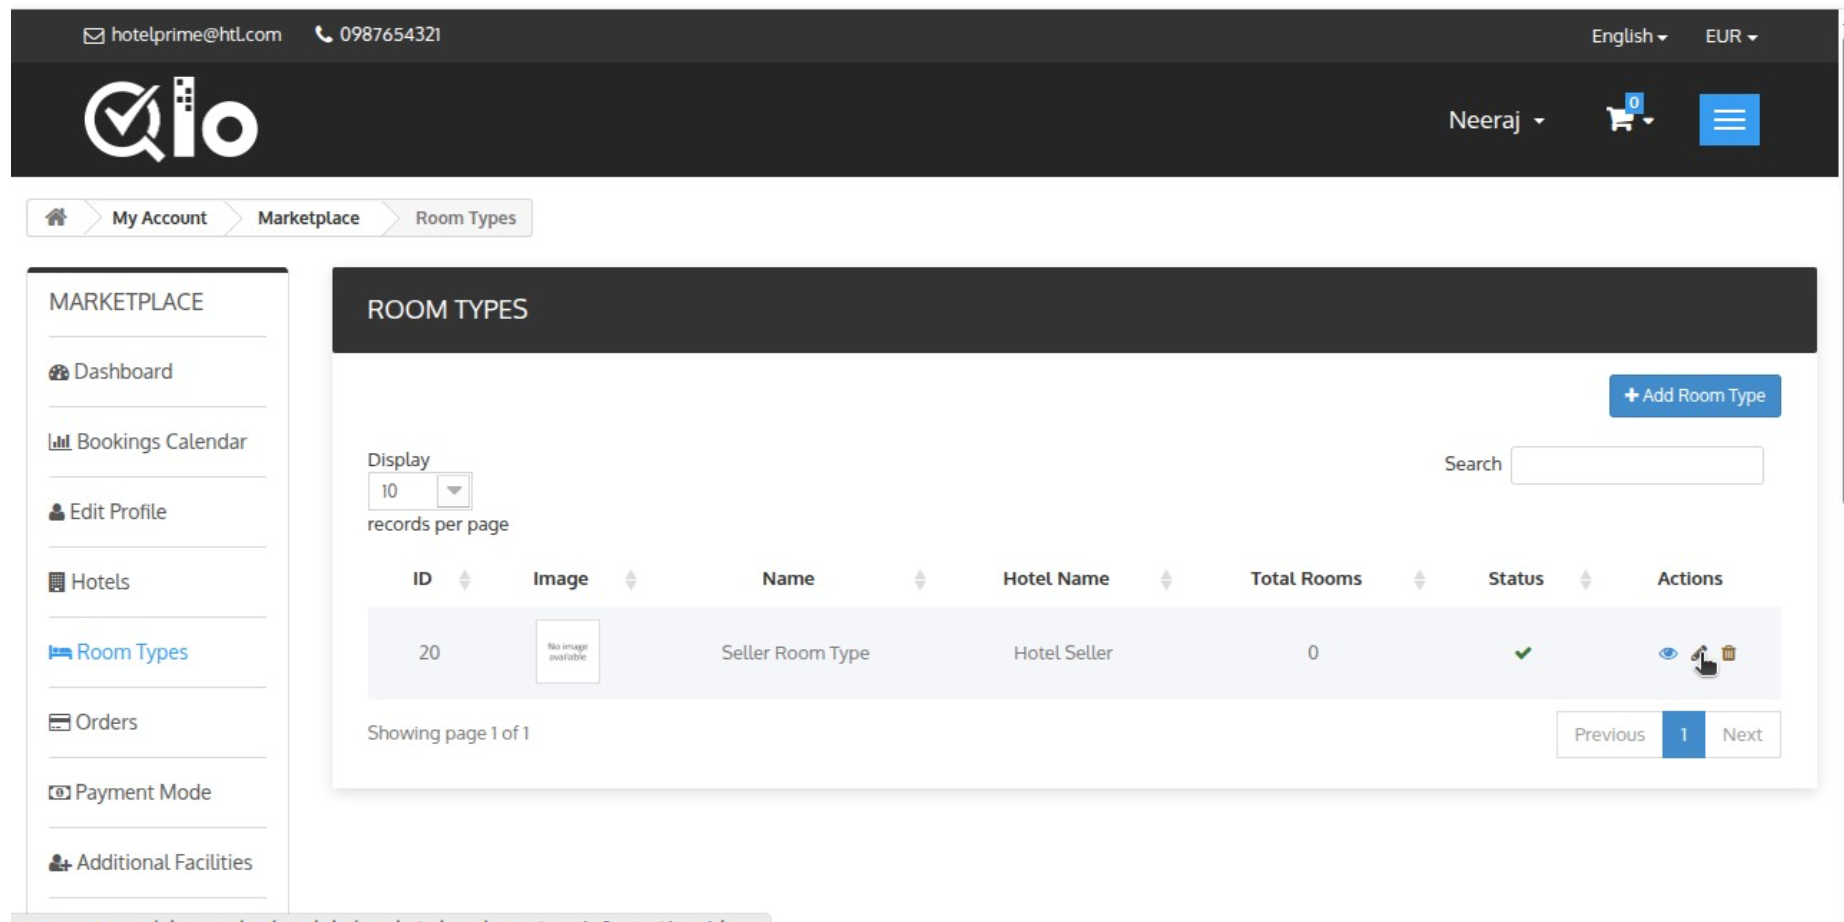
Room Types
Using the room types tab, the seller can add and update the room types of the hotel.
When the seller hotel is live on the QloApps marketplace, they can start adding room types to it.
To add a new room type the seller will Go to the ‘Room Types’ tab -> Click on the ‘Add Room Type’ button.
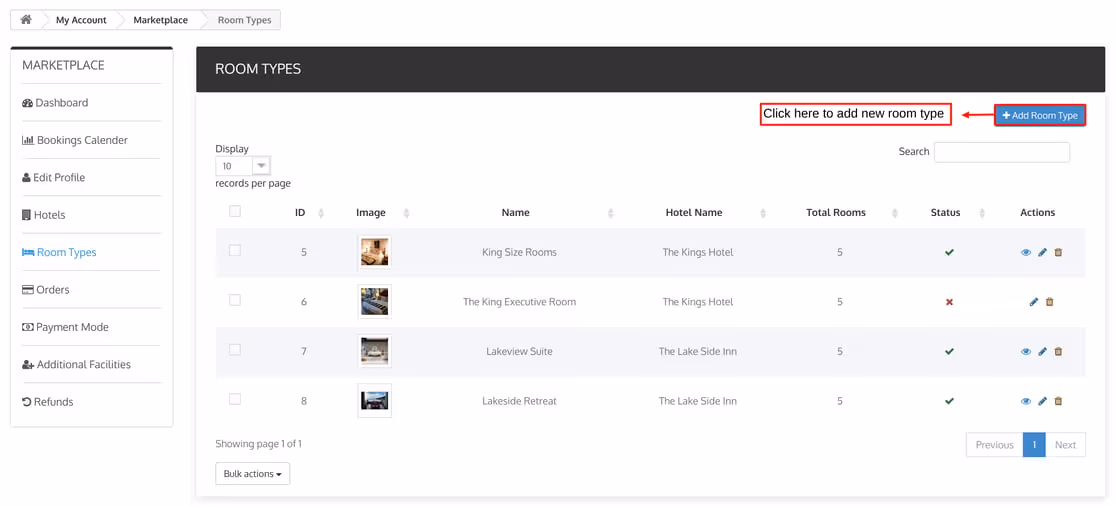
Once the seller clicks on Add new room type, a form will appear and the seller needs to fill in all the room type-related information in various sections and save it.
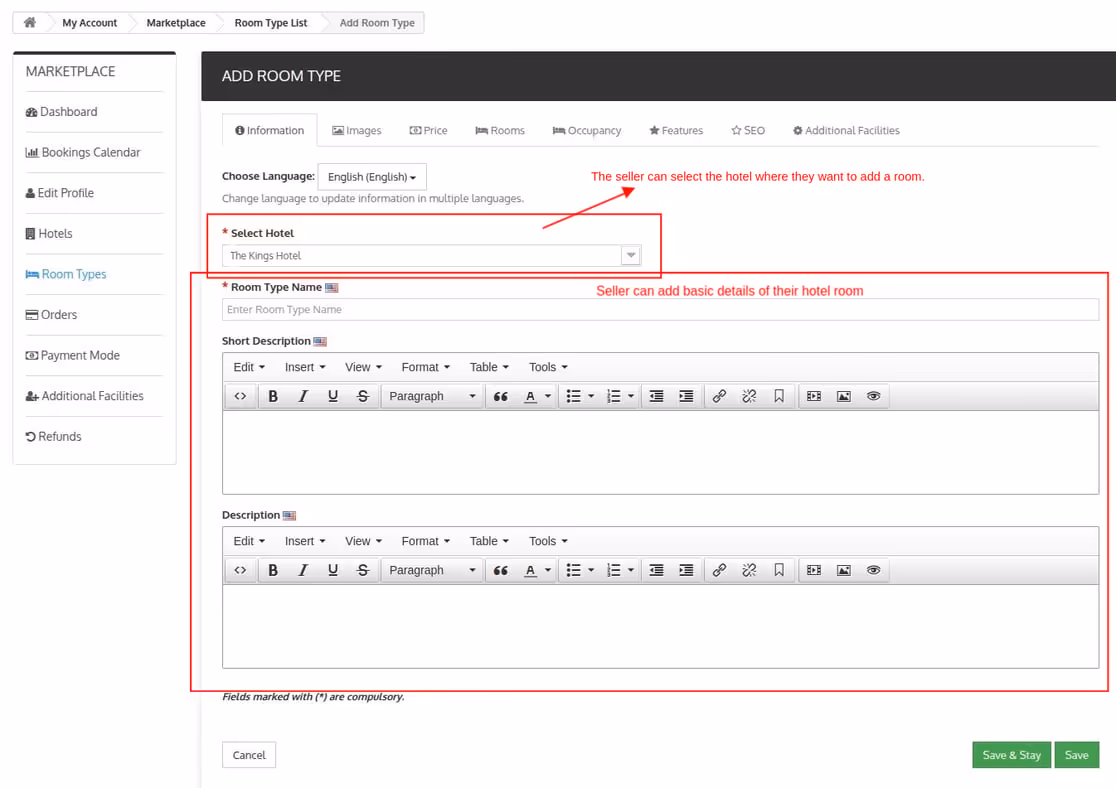
Information
In this section, the seller will add the basic details of the room type and assign the room type to a particular hotel.
Discounts by Room Type, Customer Groups & Date Range
Room Types > Edit room type > Price > Advanced Price
Rule > Add New Rule > Fill required details > Select Room Type & Date
Range > Save
• Manage pricing and discounts
under the Price section in their room type settings:
• Base Price: Set the base price and cost price of the room type. You can also
configure tax rules and enable advance payments here.
• Specific Price: Add special prices for particular periods, customer groups, or
conditions.
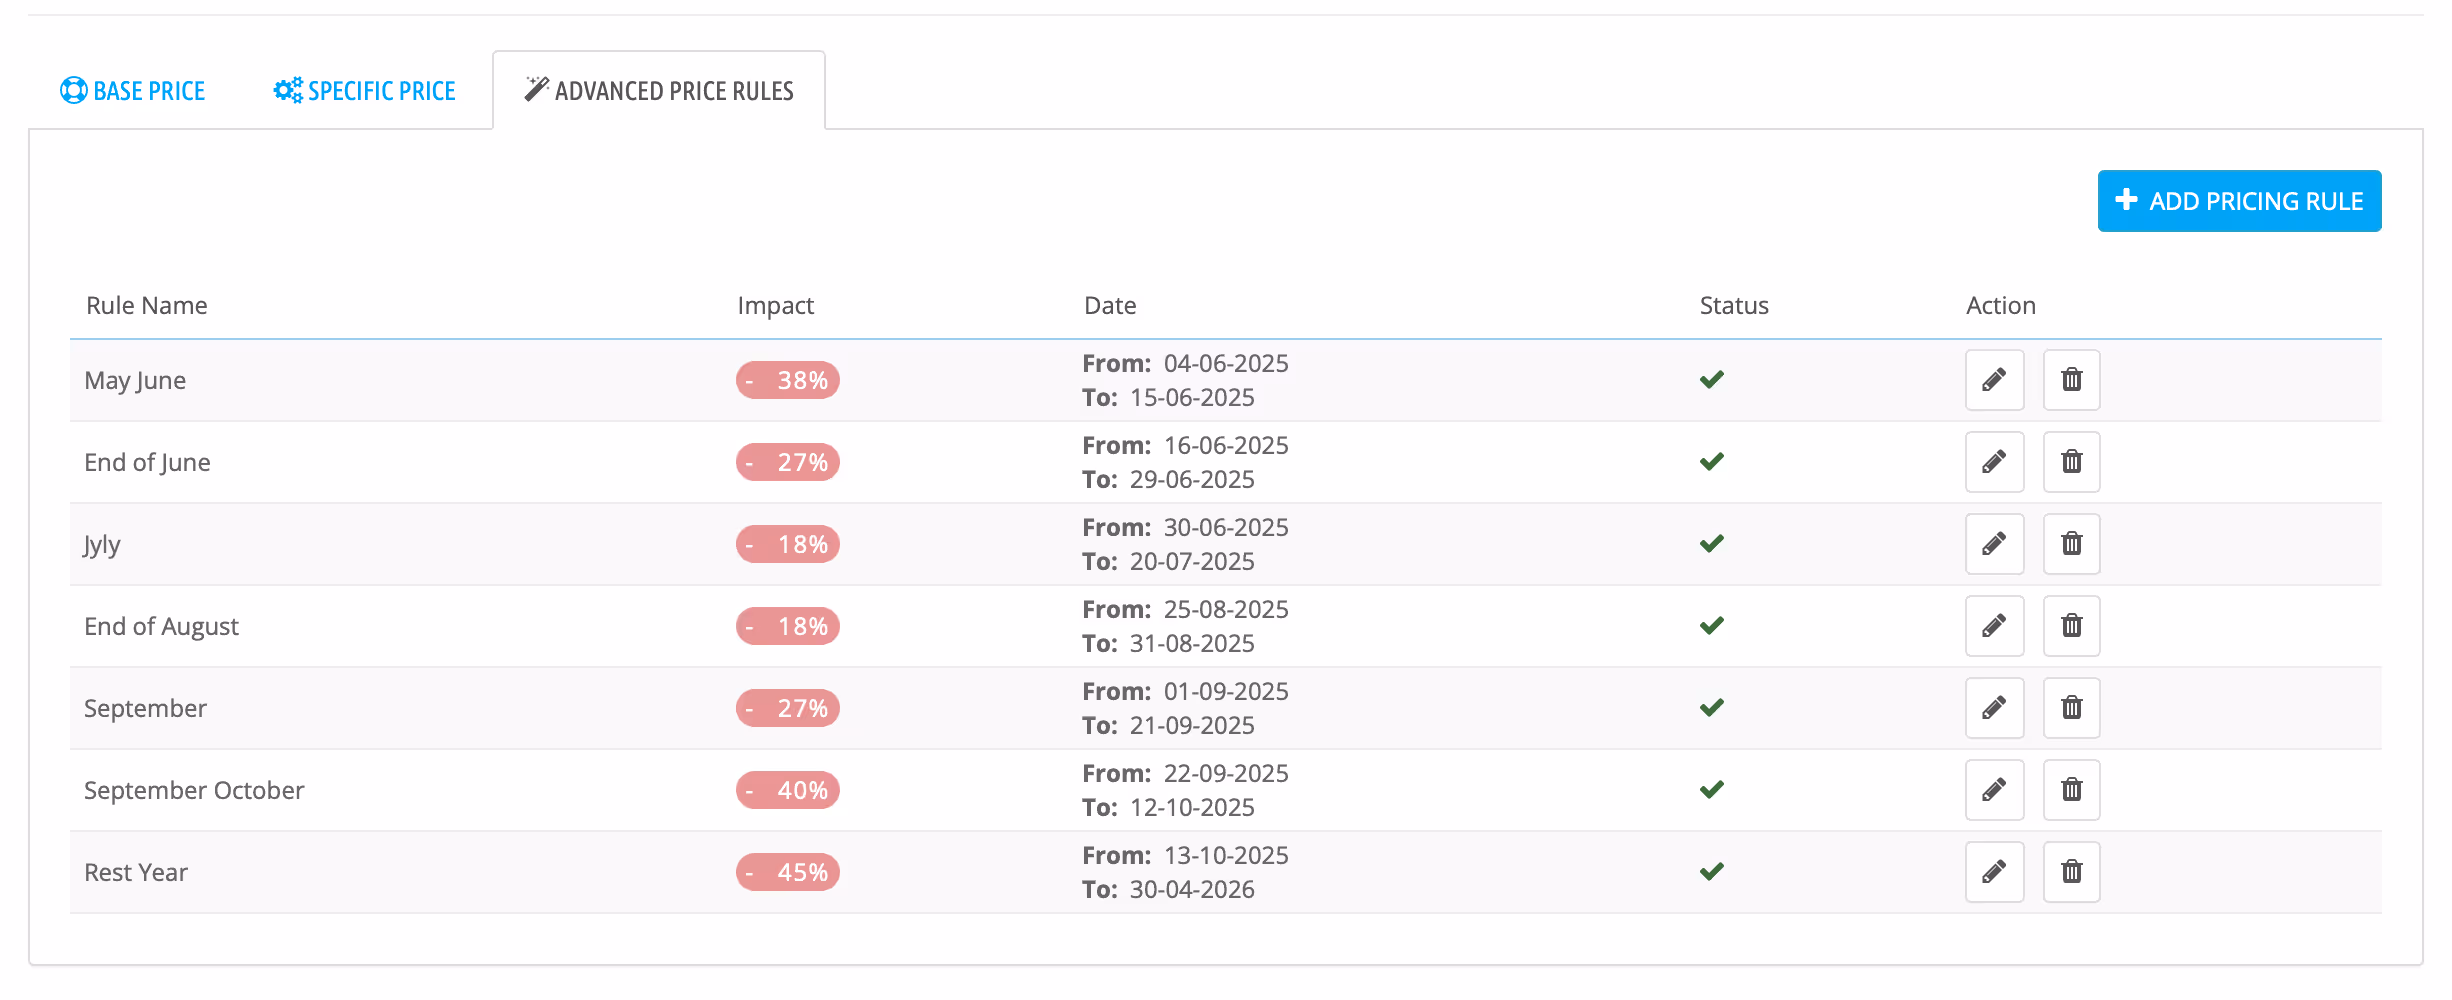
• Advanced Price Rule: Sellers can see all existing price rules and create new
ones by clicking Add Pricing Rule. Here, you can define discounts based on:
• Room Type
• Customer Group
• Date Range


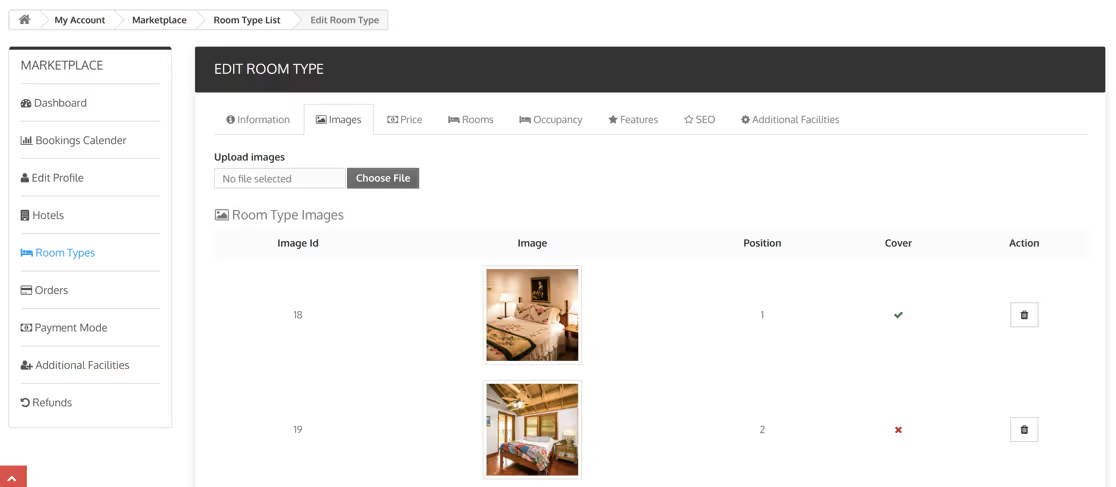
Images
The seller can upload room-type images in the Images section.
Price
The Price section allows Sellers to set the base price, tax rate, advance payment, specific price and pricing rules of the room type.
Base Price
In the base price section, the seller will add the base price and the cost price of the room type.
He can also set the tax rule that applies to the cost of room type using the tax rule option.
Using the advance payment option the seller can enable and manage the advance payment option for the room type.
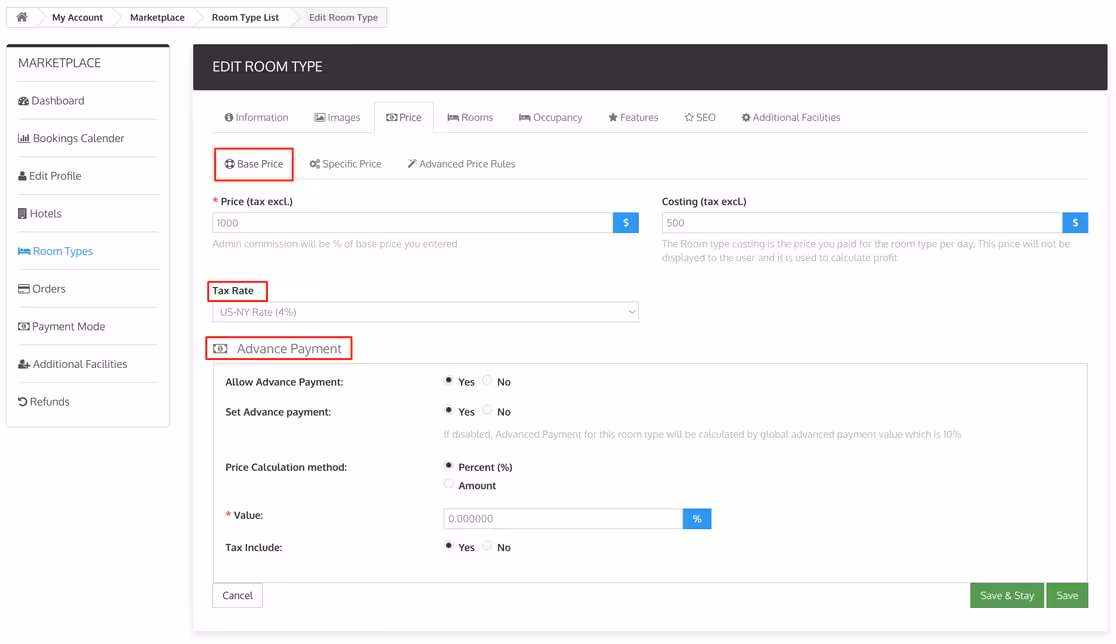
Specific Price
You can set the specific price of the room type using this section.

Advanced Price Rule
Sellers can view all the created advanced price rules for the room type in this section.
To create a new price rule, the seller has to click on the add pricing rule and fill in all the information about the rule.


Occupancy Based Pricing
The Occupancy Based Pricing Module is a powerful add-on that enhances your hotel’s pricing strategies.
Whether you price rooms on a per-night basis or by occupancy, this module provides the flexibility to adapt to varying guest needs.
With multiple price strategies, customizable settings, and seamless integration, it empowers hoteliers to optimize revenue and provide transparent price to their guests.
Module Setup
To make any hotel’s pricing model to occupancy Based pricing model:
- Navigate to “Hotel Reservation System” then select “Manage Hotel” sub tab. You will see an interface similar to the below image.
.avif)
2. You need to click on edit button of the hotel whose Pricing Type you want to change. Also you can make new hotel with Occupancy based pricing type by just clicking on the “”Add new Hotel” button.
.avif)
.avif)
3. Fill all details and when you reach the “Occupancy Based Pricing” section you need to select “Occupancy Based Price” in ” Pricing method ” field.

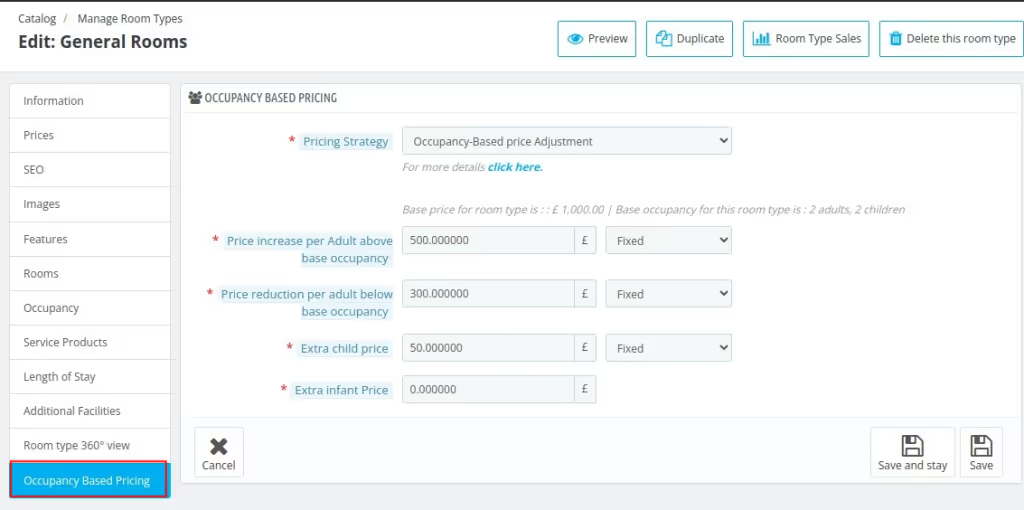
4. After that we have to set pricing strategy of each room type, to do this go to “Catalog” tab then select “Manage Room Type” sub tab.
.avif)
5. Click “Add new Room Type” button to add new room type. Enter all the details and when you reach the “Occupancy Base Pricing” section you need to select the “Pricing Strategy“.
There Are 4 Pricing Strategies:
1. Occupancy- Based Price Adjustment
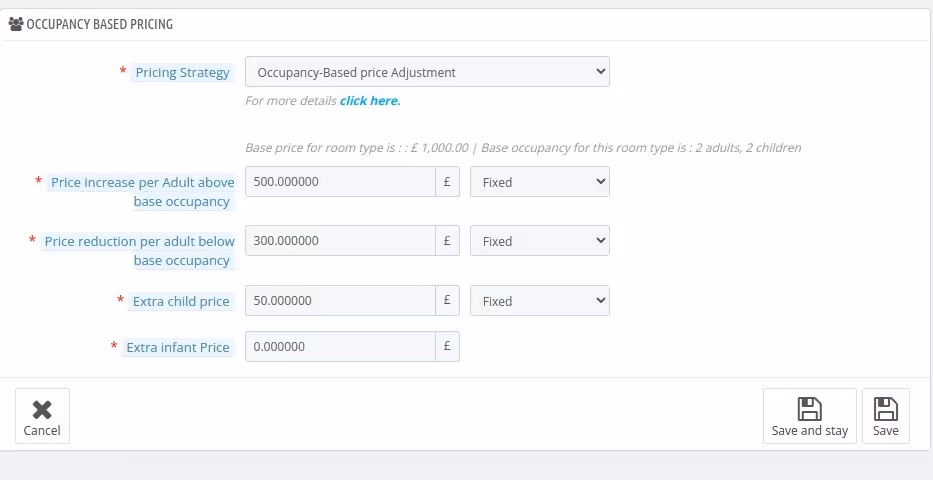
Occupancy-based price adjustments enable dynamic pricing tailored to guest numbers in relation to the base occupancy. The base room price is applied when bookings match the defined base occupancy.
Additional Adults:
If the number of adults exceeds the base occupancy, an extra charge is calculated using either a fixed amount or a percentage of the base price.
Conversely, if the adult count is below the base occupancy, a reduction is applied similarly.
Additional Children:
Charges for extra children beyond the base child occupancy are determined using a predefined formula, calculated as a fixed amount or a percentage of the base price.
Additional Infants:
For infants exceeding the base infant occupancy, additional pricing is applied per infant, using a similar fixed or percentage-based approach.
This pricing model ensures flexible and accurate adjustments for diverse occupancy levels.
- Price Increase Per Adult Above Base Occupancy: Enter the value that you want to add for each additional adult exceeding the base occupancy for the selected room type.
- Price reduction per adult below base occupancy: Use this field to specify the reduction in cost applied when an adult is less than the base occupancy.
- Extra child price: Use this field to specify the additional cost applied for each child.
- Extra infant Price: Use this field to specify the additional cost applied for each infant.
2. Per-Guest Pricing
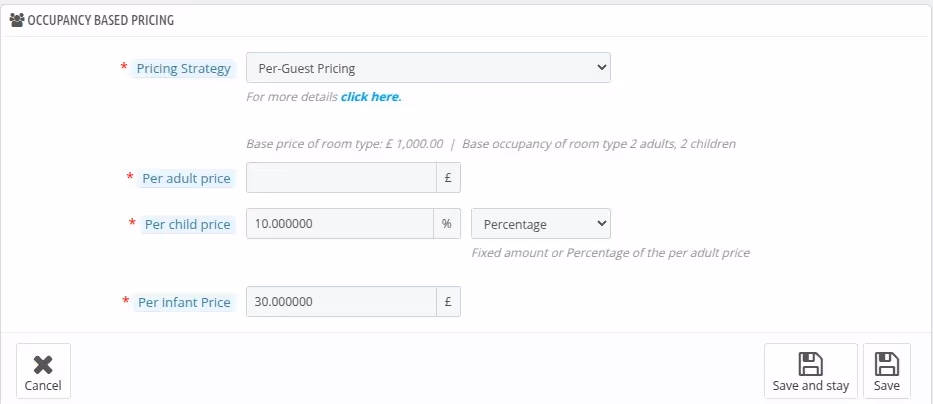
The price is calculated by multiplying the number of guests by their respective rates for adults, children, and infants.
You can set individual rates for each type of occupant—adults, children, and infants. The total room price is then determined by summing the costs for all categories of guests in the booking.
For children’s pricing, you can either set a fixed amount or a percentage of the adult price. For infants, enter a fixed amount per infant occupancy.
- Per adult price : Use this field to enter the price of each adult in the booking.
- Per child price: Use this field to enter the price of each child in the booking.
- Per infant Price: Use this field to enter the price of each infant in the booking.
3. Price For Each Occupancy Level

This feature lets you set tailored pricing for each adult occupancy level, based on the number of adults in the room, up to its maximum adult capacity.
Adult Pricing:
Set individual prices for each adult occupancy level (e.g., 1 adult, 2 adults, 3 adults, and so on, up to the maximum adult capacity of the room).
This enables you to offer tailored rates based on the number of adults occupying the room.
Child Pricing:
Enter a fixed price for each child occupying the room. This price remains consistent regardless of the number of children staying, ensuring clarity in the billing process.
Infant Pricing:
Set a fixed price for infants staying in the room, allowing for precise pricing based on the number of infants in the booking.
This flexible pricing model ensures guests are charged accurately by occupancy type, optimizing revenue while catering to their specific composition and maximizing fairness.
4. Derived Pricing

Derived pricing adjusts the price for each adult occupancy level based on the room’s base occupancy price, ensuring dynamic pricing according to the number of occupants.
- Base Price: The base price for the room is derived directly from the room type’s set rate for the base adult occupancy.
- Adjustment for Extra or Fewer Adults: For each additional or fewer adult, you can define how the price will change:
- Impact Way: Choose whether the adjustment increases or decreases the price based on the number of adults.
- Impact Value: Specify the adjustment amount per occupant, either infant price : Enter the price for per infant occupancy as a fixed price or a percentage of the base price.
- Impact Type: Indicate if the adjustment is a fixed amount or a percentage of the base price.
- Child Pricing: For children, enter the price either as a fixed amount or as a percentage of the base adult occupancy price.
- Infant Pricing: Set a fixed price for infants per occupancy.
This approach provides flexibility and accuracy, enabling you to adjust room rates based on occupancy levels and guest composition, ensuring alignment with your hotel’s revenue goals.
Setting Advance Price Rule Based On Occupancy
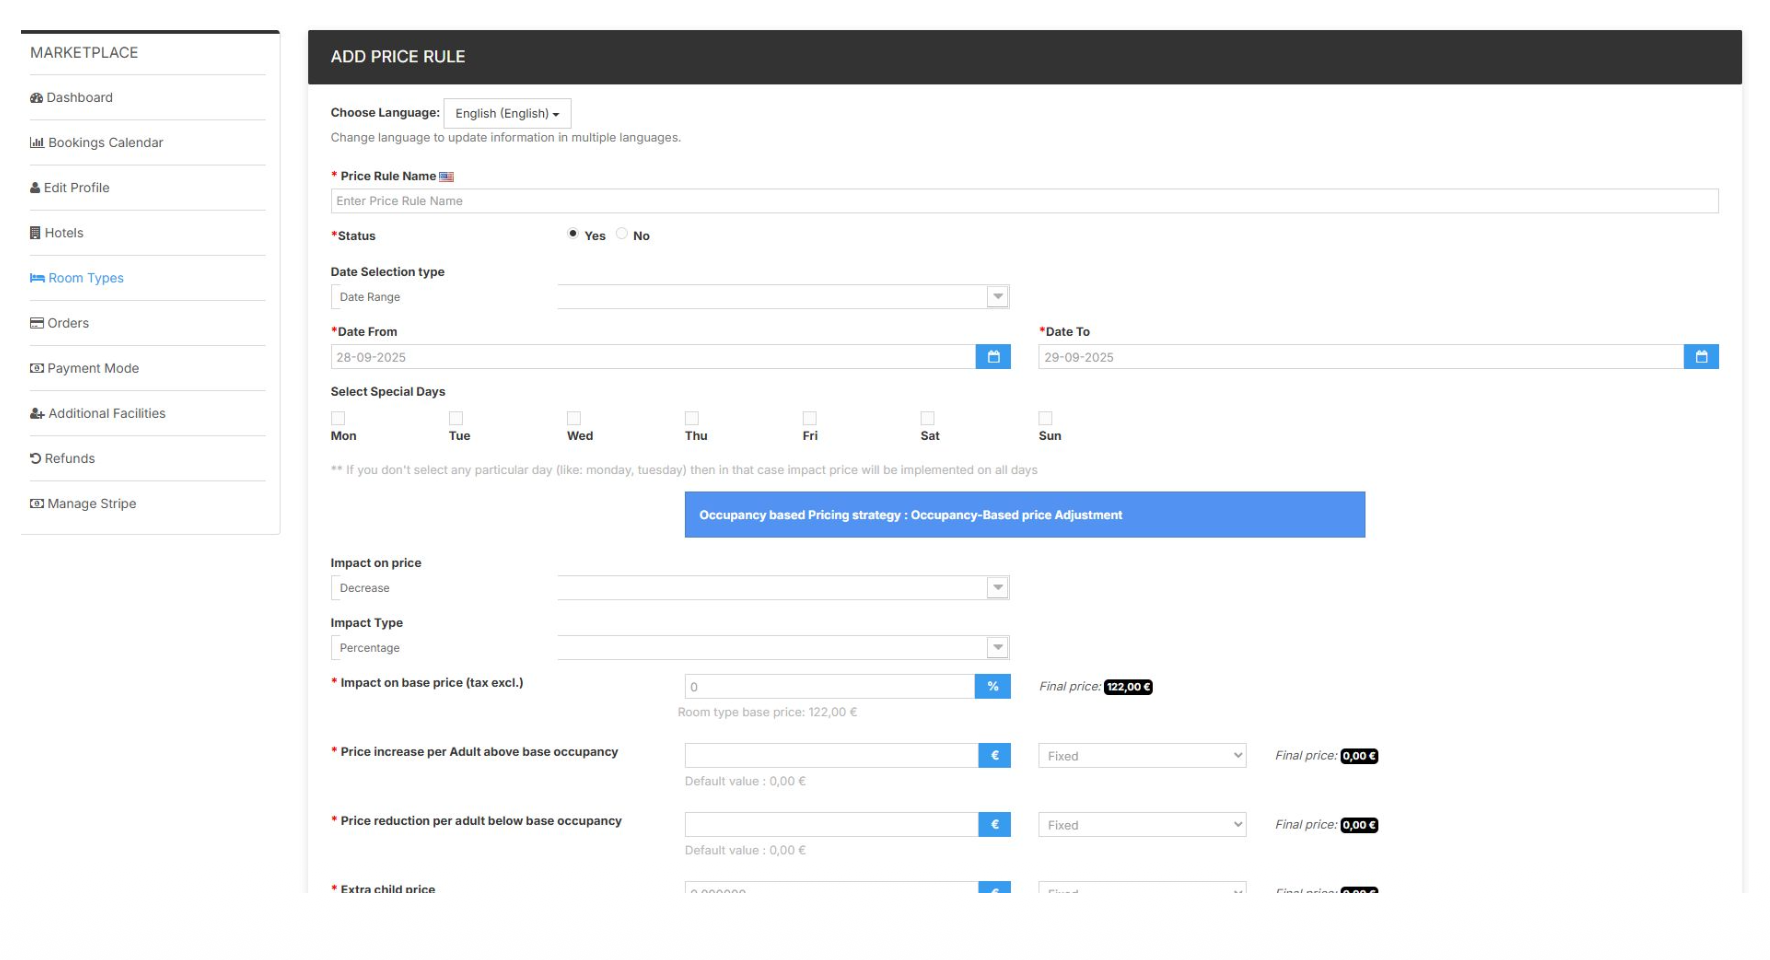
1. Occupancy-Based Price Adjustment
Advance Price Rule Name: Enter the name of the Advance Price rule.
Room Type : Enter the type of the room type this rule is associated with.
Date Selection type: Select the date selection type.
Impact way: Select whether you want to increase or decrease the price.
Impact on base price (tax excl.) : Enter the value to update the base occupancy price for the selected room type.
Price increase per Adult above base occupancy : Enter the value which you want to add for each additional adult exceeding the base occupancy for the selected room type.
Price reduction per adult below base occupancy : Enter the value that you want to decrease for each adult below the base occupancy for the selected room type.
Extra child price : Enter the price to be increased for each children above the base occupancy of the children in each booking.
Extra infant price : Enter the price to be increased for each infant above the base occupancy of the infant in each booking.
2. Per-Guest Pricing

Impact on adult price : Enter the value which you want to update for per adult occupancy.
Per child price : Enter the price for per child occupancy. (will change based on Impact Value)
Per infant price : Enter the price for per infant occupancy. (will change based on Impact Value)
3. Price For Each Occupancy Level
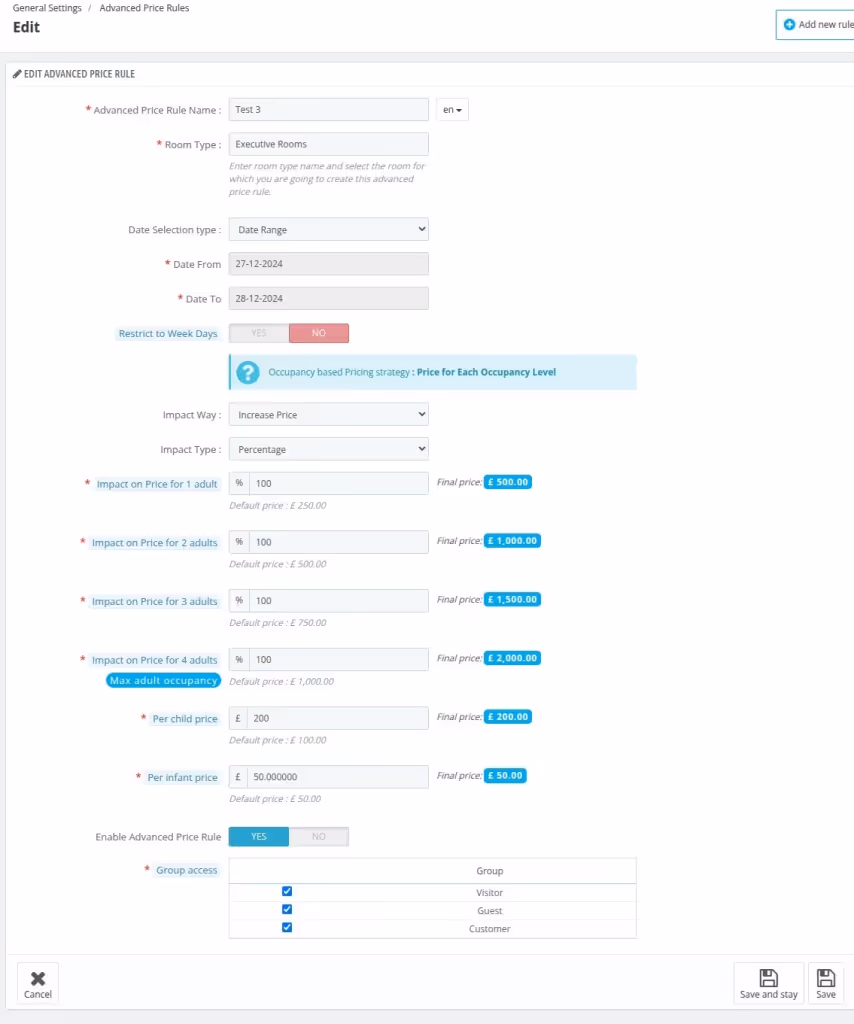
Impact on Price for 1 adult : Enter the price which you want to update for 1 adult occupancy. (will change based on Impact Value)
Impact on Price for 2 adult : Enter the price which you want to update for 2 adult occupancy. (will change based on Impact Value)
Note: You have to enter the Impact on Price for n adults where n is the maximum number of adults .
Per child price : Enter the price for per child occupancy. (will change based on Impact Value)
Per infant price : Enter the price for per infant occupancy. (will change based on Impact Value)
4. Derived Pricing
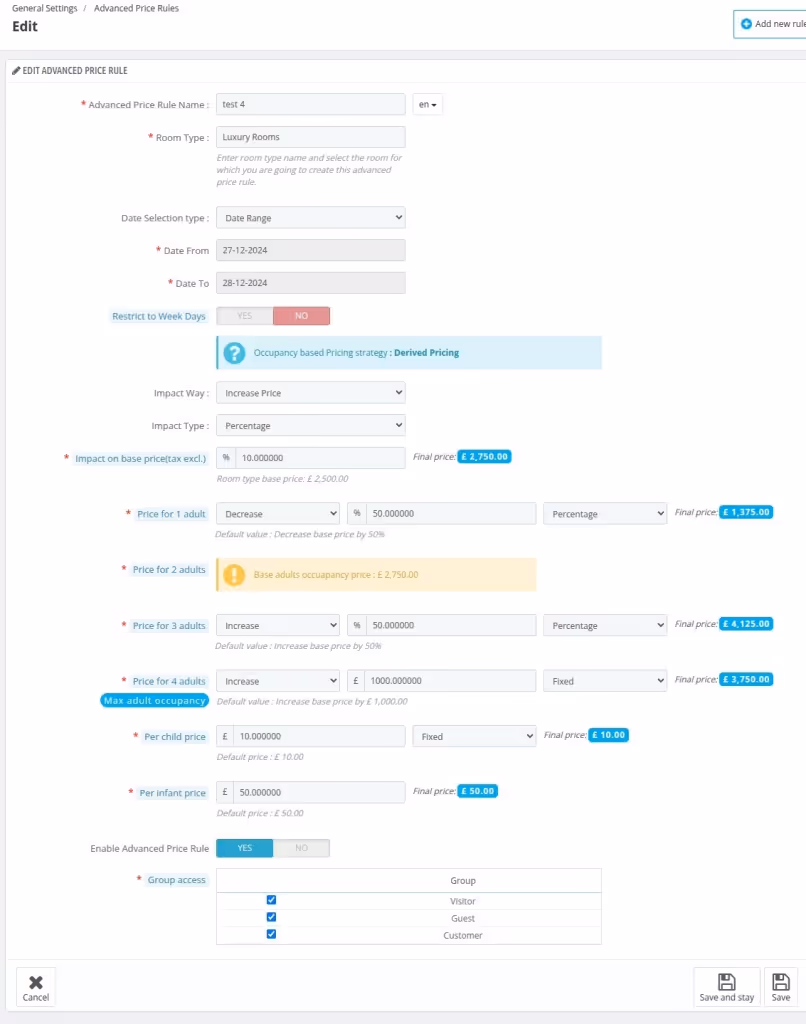
1. Impact on base price( tax excl.) : Enter the value that you want to update for the base occupancy price of the room type.
2. Price for 1 adult : Enter the price that you want to update for 1 adult occupancy. (will change based on Impact Value)
3. Price for 2 adult : Enter the price which you want to update for 2 adult occupancy. (will change based on Imapct Value)
4. Price for 3 adult : Enter the price that you want to update for 3 adult occupancy. (will change based on Impact Value)
Note: You have to enter the Impact on Price for n adults where n is the maximum number of adults .
5. Per child price : Enter the price for per child occupancy. (will change based on Impact Value)
6. Per infant price : Enter the price for per infant occupancy. (will change based on Impact Value)
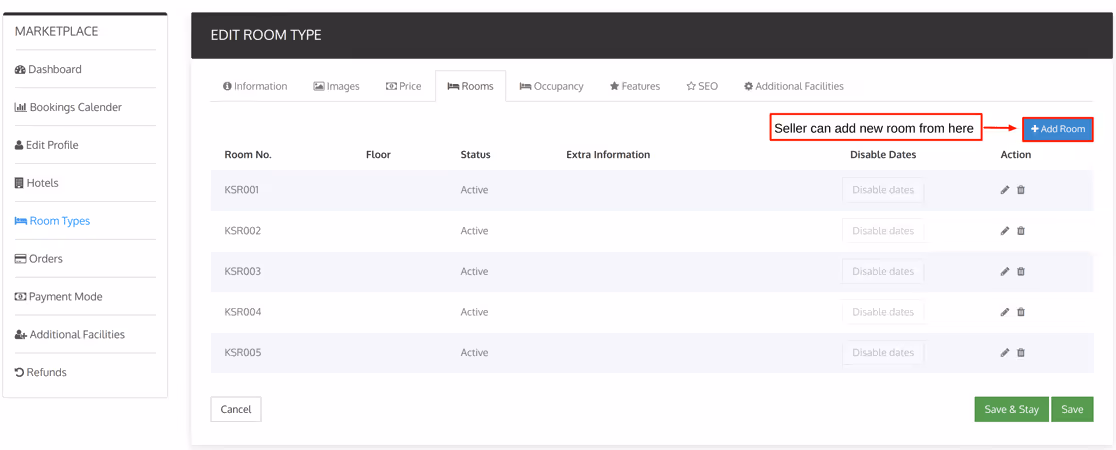
Rooms
After setting the prices seller can add the inventory for the room type from the room’s section.
Occupancy
In this section, the seller can set the base occupancy and the maximum occupancy of the room type.

How to create Minimum Length Of Stay rules.
Click on `ROOM TYPES` tab in Account page
Click on “edit” icon on any room type.
Click on `Length of Stay` tab and it lands to MLOS configuration form
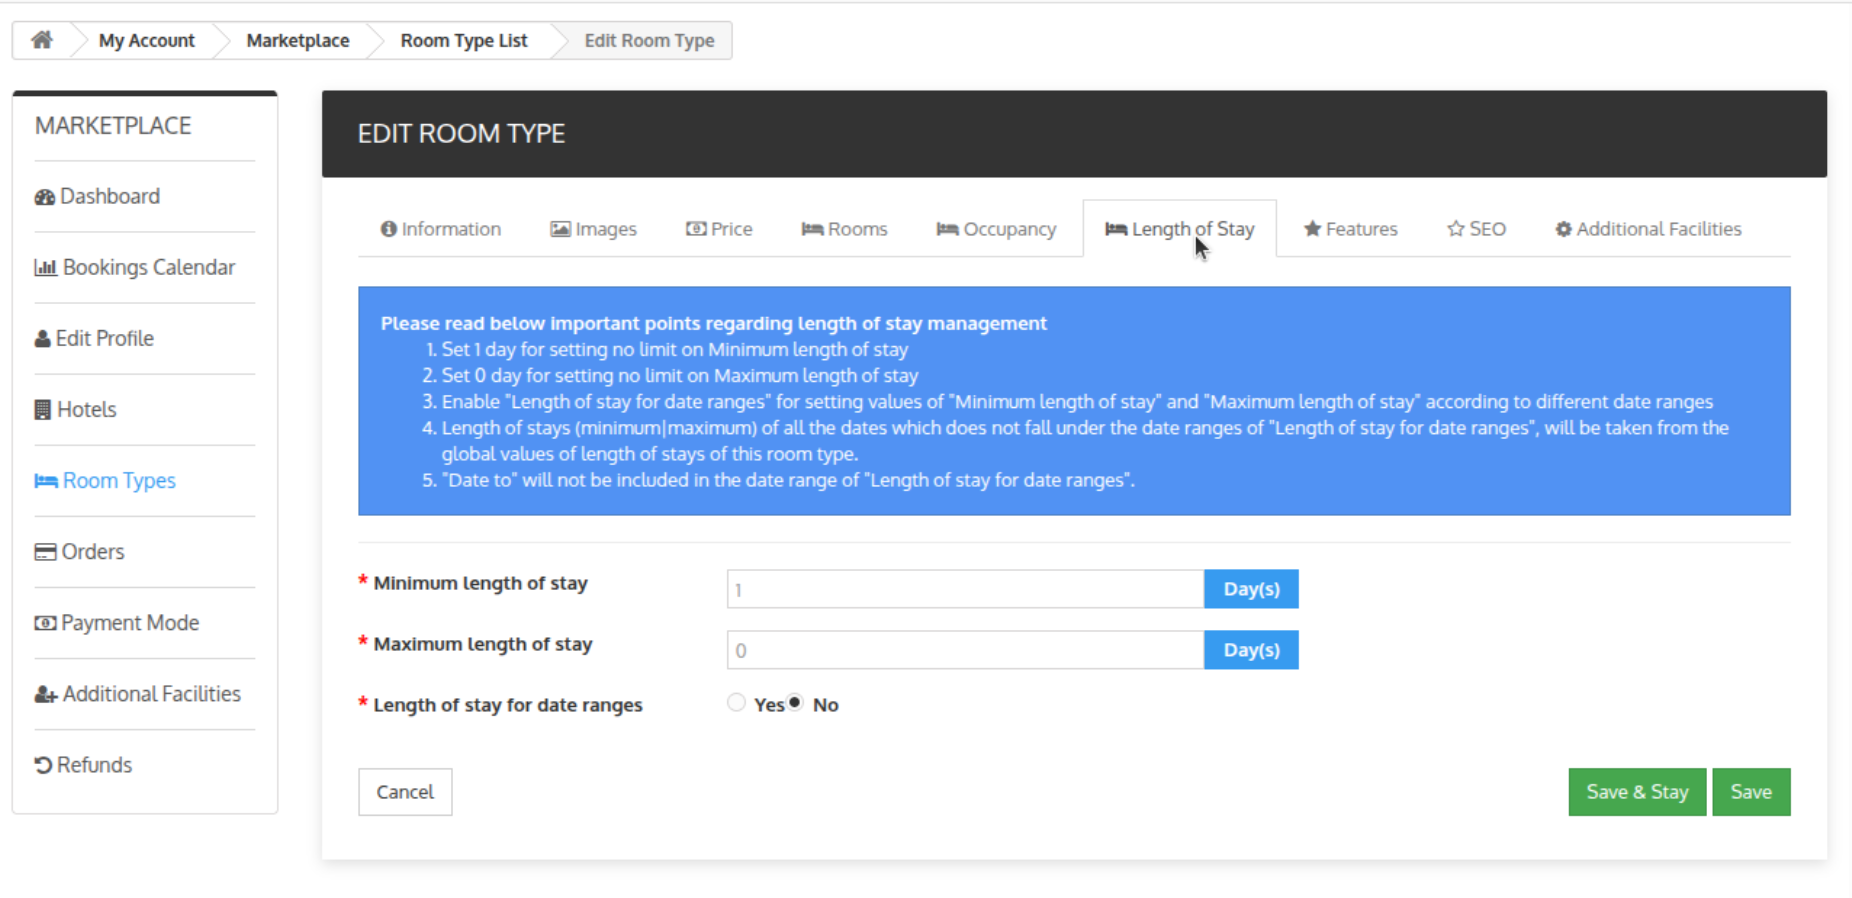
fill the details and save it (configuration options given below).
• Minimum length of stay: this option is given to define minimum duration
of booking for a particular room type (i.e. if you put 3 (since 1 for no restriction)
in this field it means when customer come to your website and search for less
than 3 days this room type will not be visible to customer).
• Maximum length of stay: this option is given to define maximum duration
of booking for a particular room type (i.e. if you put 7 (since 0 for no restriction)
in this field it means when customer come to your website and search for more
than 7 days this room type will not be visible to customer)..
• Length of stay for date ranges: this option is given to define minimum
and maximim duration of booking which will only be applicable to given date
ranges.
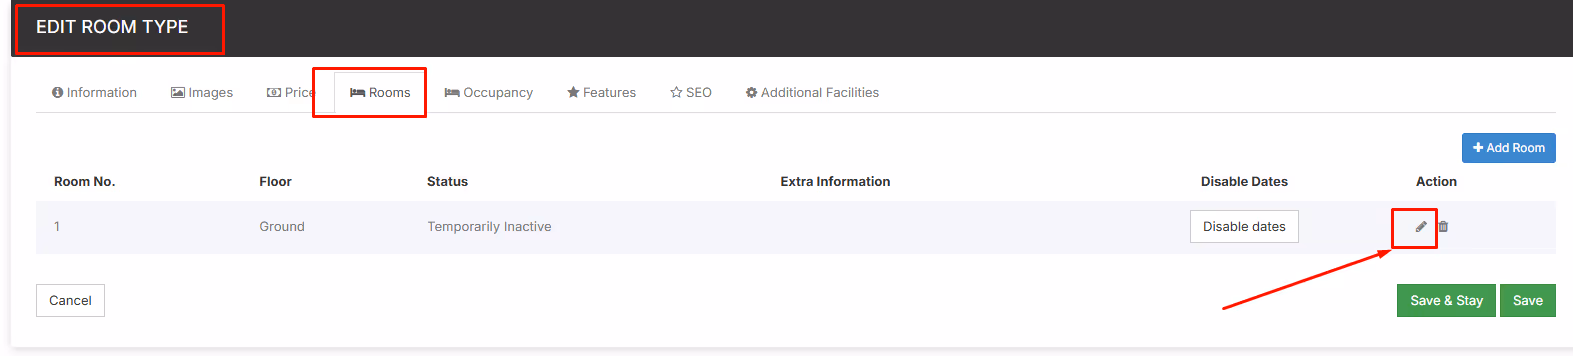
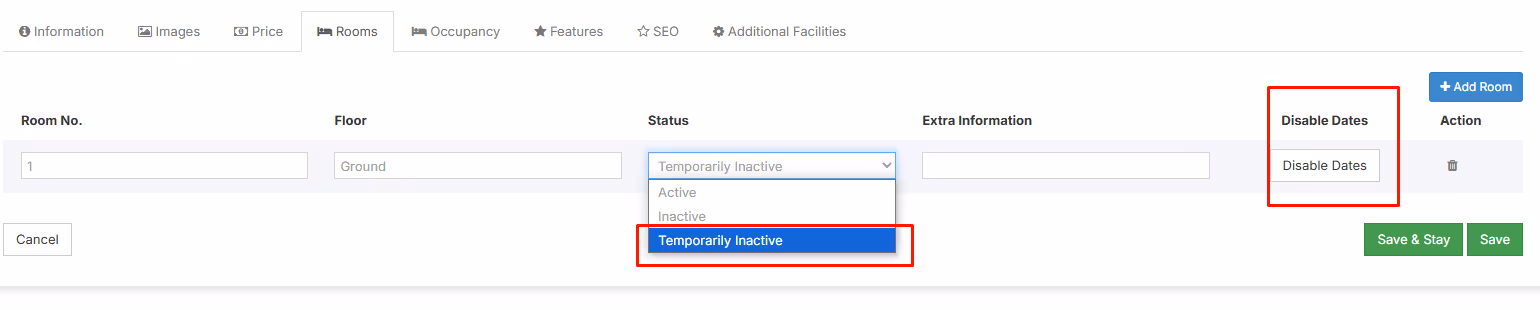
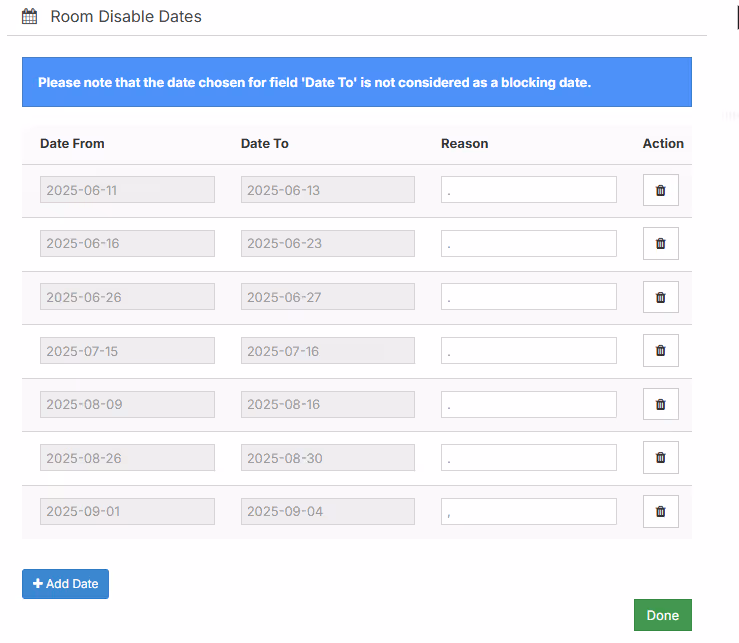
Availability
To manage availability, go to the admin panel: Room Types → Click the pencil icon on the corresponding room type, then go to the Rooms tab → Click the pencil icon again, and under Status, select Temporarily Inactive.→ On the right-hand side, choose the availability dates.


Features
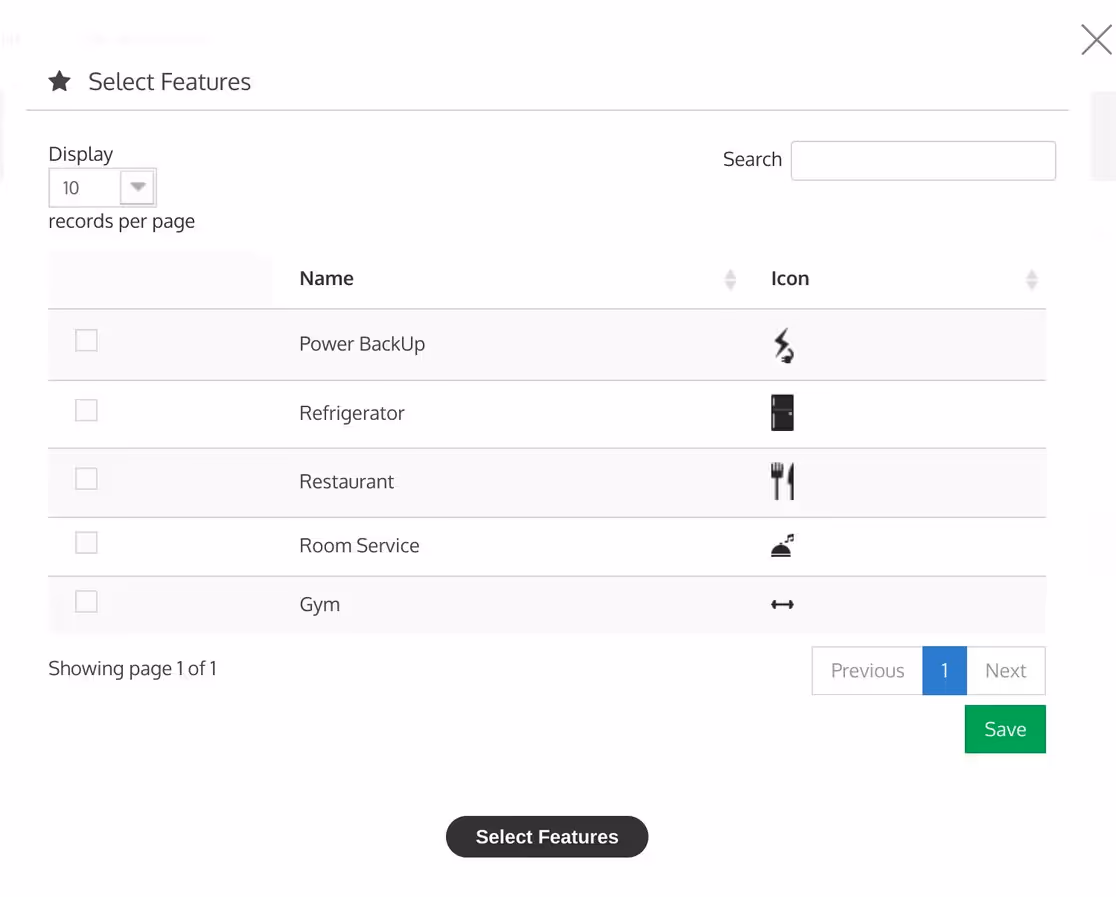
In the Features section, the seller can select and add features for the room type.
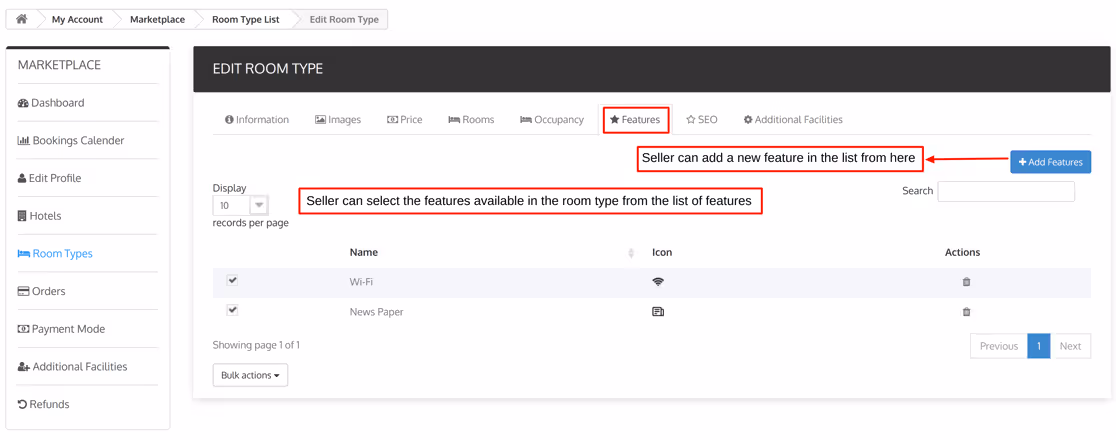
After clicking on Add Features, the seller can choose and add the features from a list of available features in the room type.
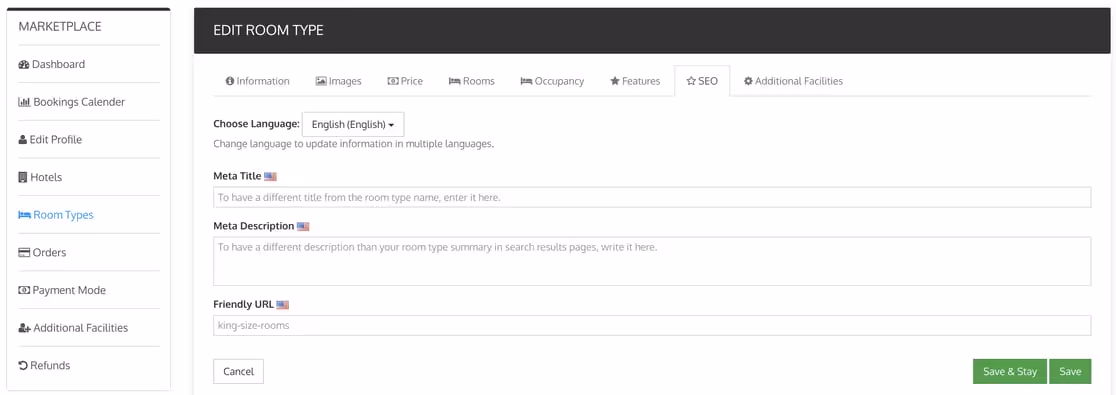
SEO
The seller can add a meta title, meta description and friendly URL for room type.
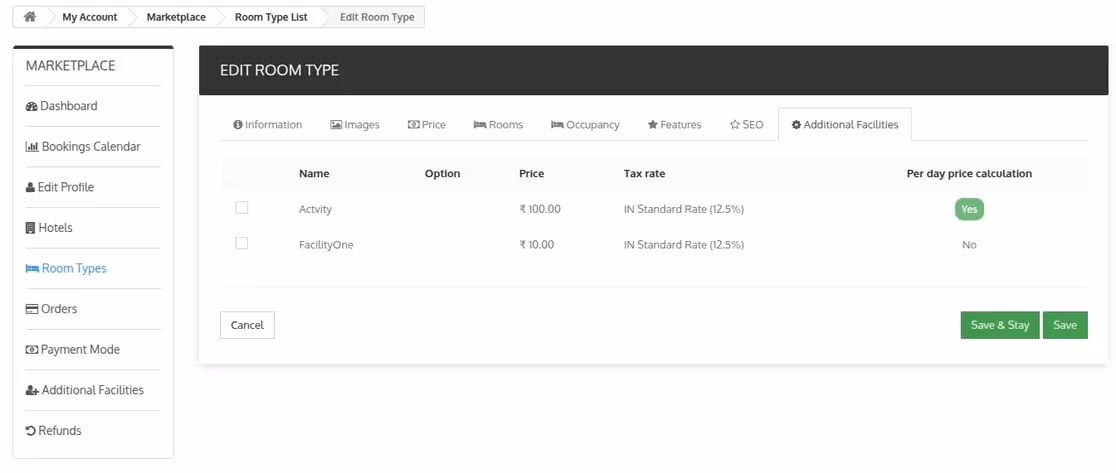
Additional Facilities
The seller can assign the additional facilities to the room type through this section.
Orders
The seller can view the order details and payment details from the order page and payment/transactions page of the orders tab.
Once orders are created, the seller can see total earnings, admin commission, admin tax, total orders, and seller’s earnings.
They can also view the amount received and the amount due to be paid by the admin.
Order Page
On the Order page, the seller can view the total earnings, admin commission, seller earnings, earnings received, seller due amount, and total orders.
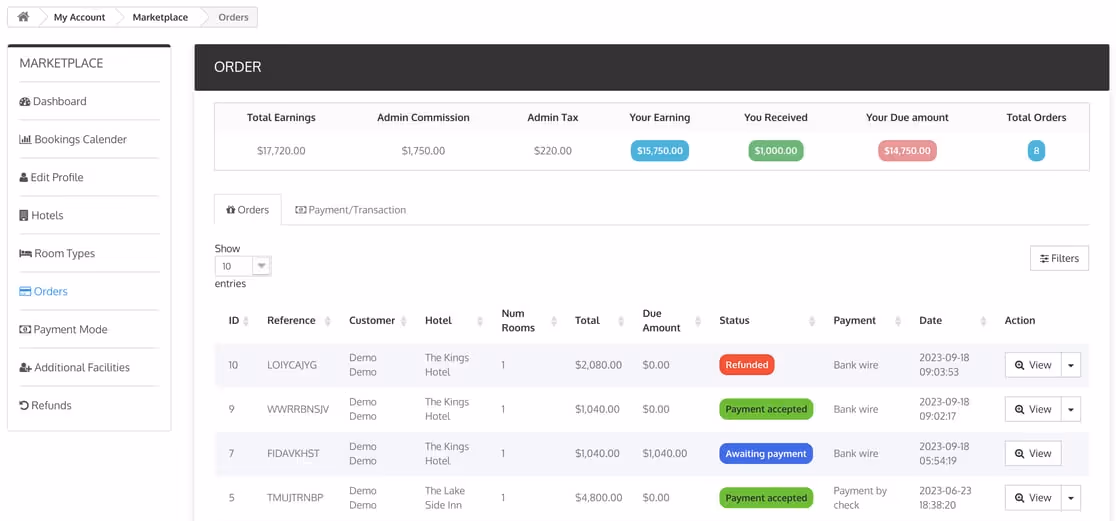
The list of all orders is displayed in this section. The seller can view the order details for each order by clicking the ‘view’ button for particular orders.
Seller Order Details Page

This is the order detail page for the sellers. On this page, sellers can view customer details and order details, and change the room status and booked rooms status.
Sellers can also edit and delete booked rooms from this page.
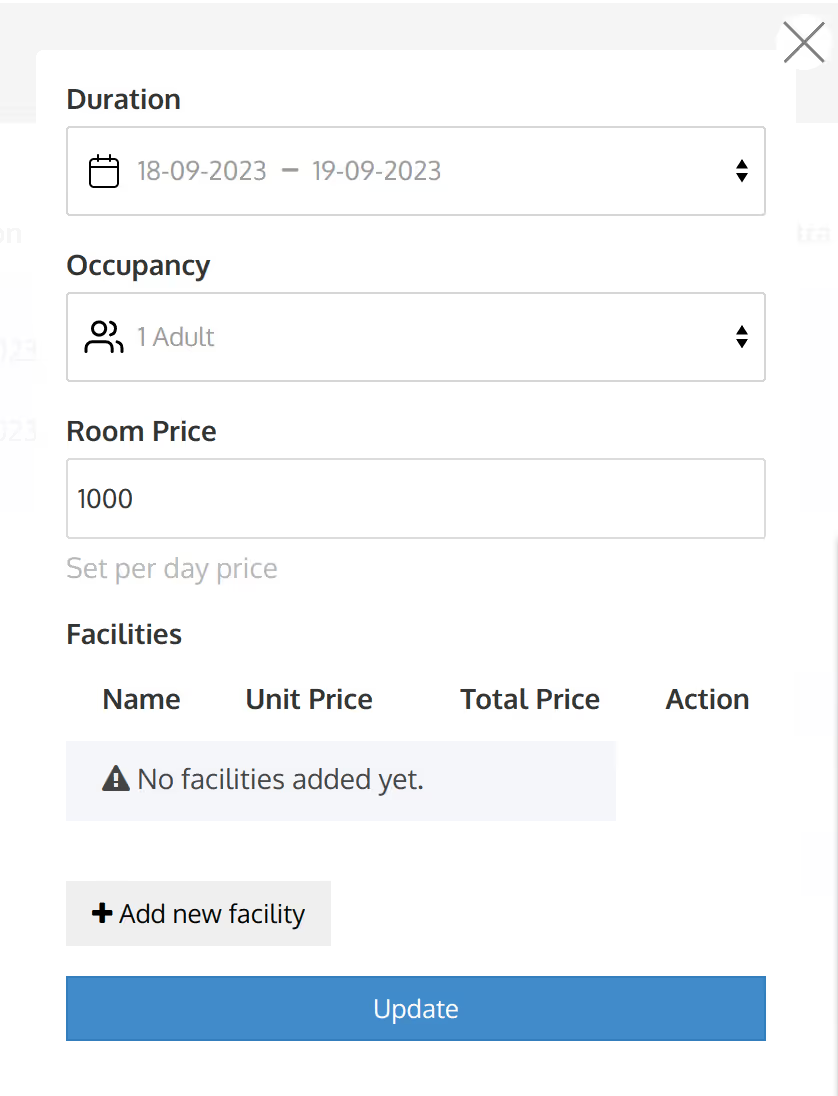
Seller Order Edit
Sellers can change and update the details of booked rooms using the edit option.

When the seller clicks the edit button, a pop-up box will appear. They can then modify booking details like duration, occupancy, price, and additional facilities.
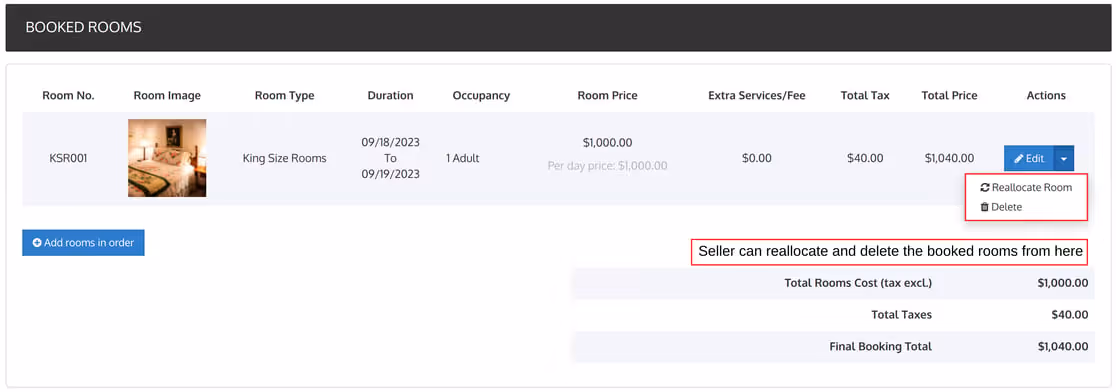
Room Reallocation And Deletion
Sellers can easily reallocate or swap rooms or delete them in the booking using the reallocate room option and delete option that is present in the drop-down of the edit button.
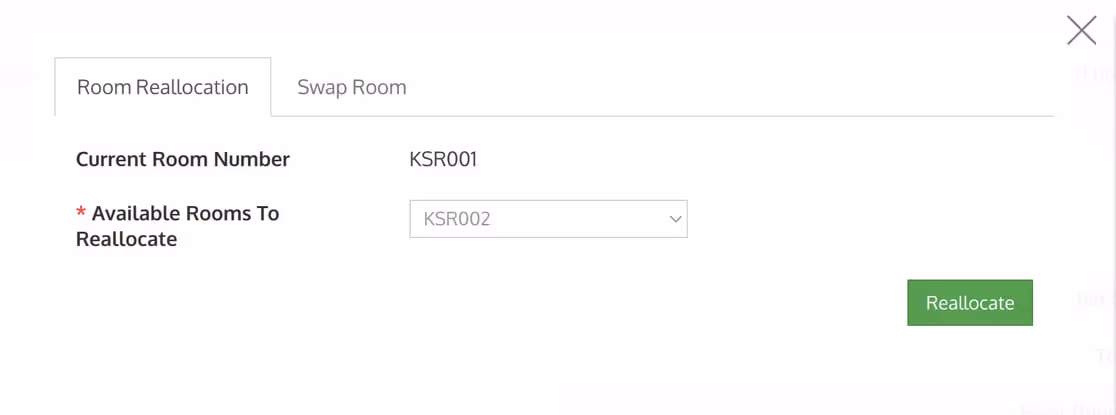
Once the seller clicks on the “reallocate room” option, a pop-up dialogue box will open using which the seller can reallocate or swap rooms.
Adding Rooms In Order
Sellers can also add any number of rooms to order by clicking on the “add rooms in order” option.
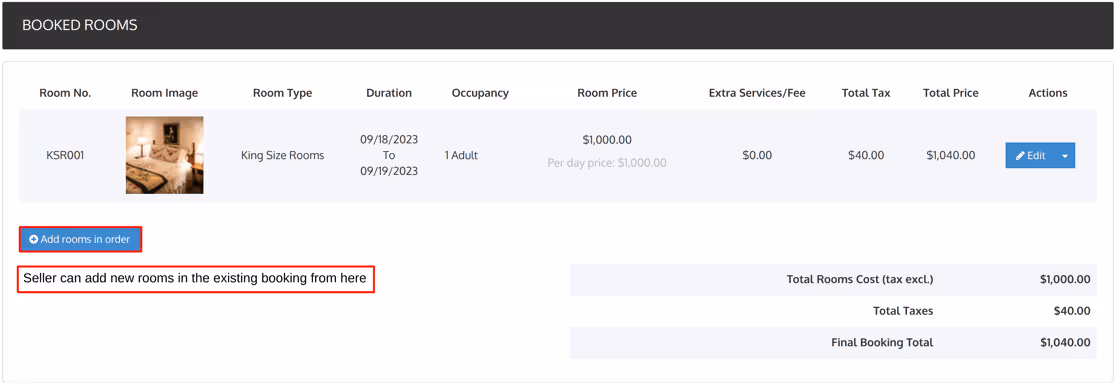
Once the seller clicks on the ” Add rooms in order” button, a pop-up will appear on the screen in which the seller will add the details of the new booking.
After entering the details including the room type, occupancy, booking duration, and price, the seller will click on “add” to add a new room to the existing booking.

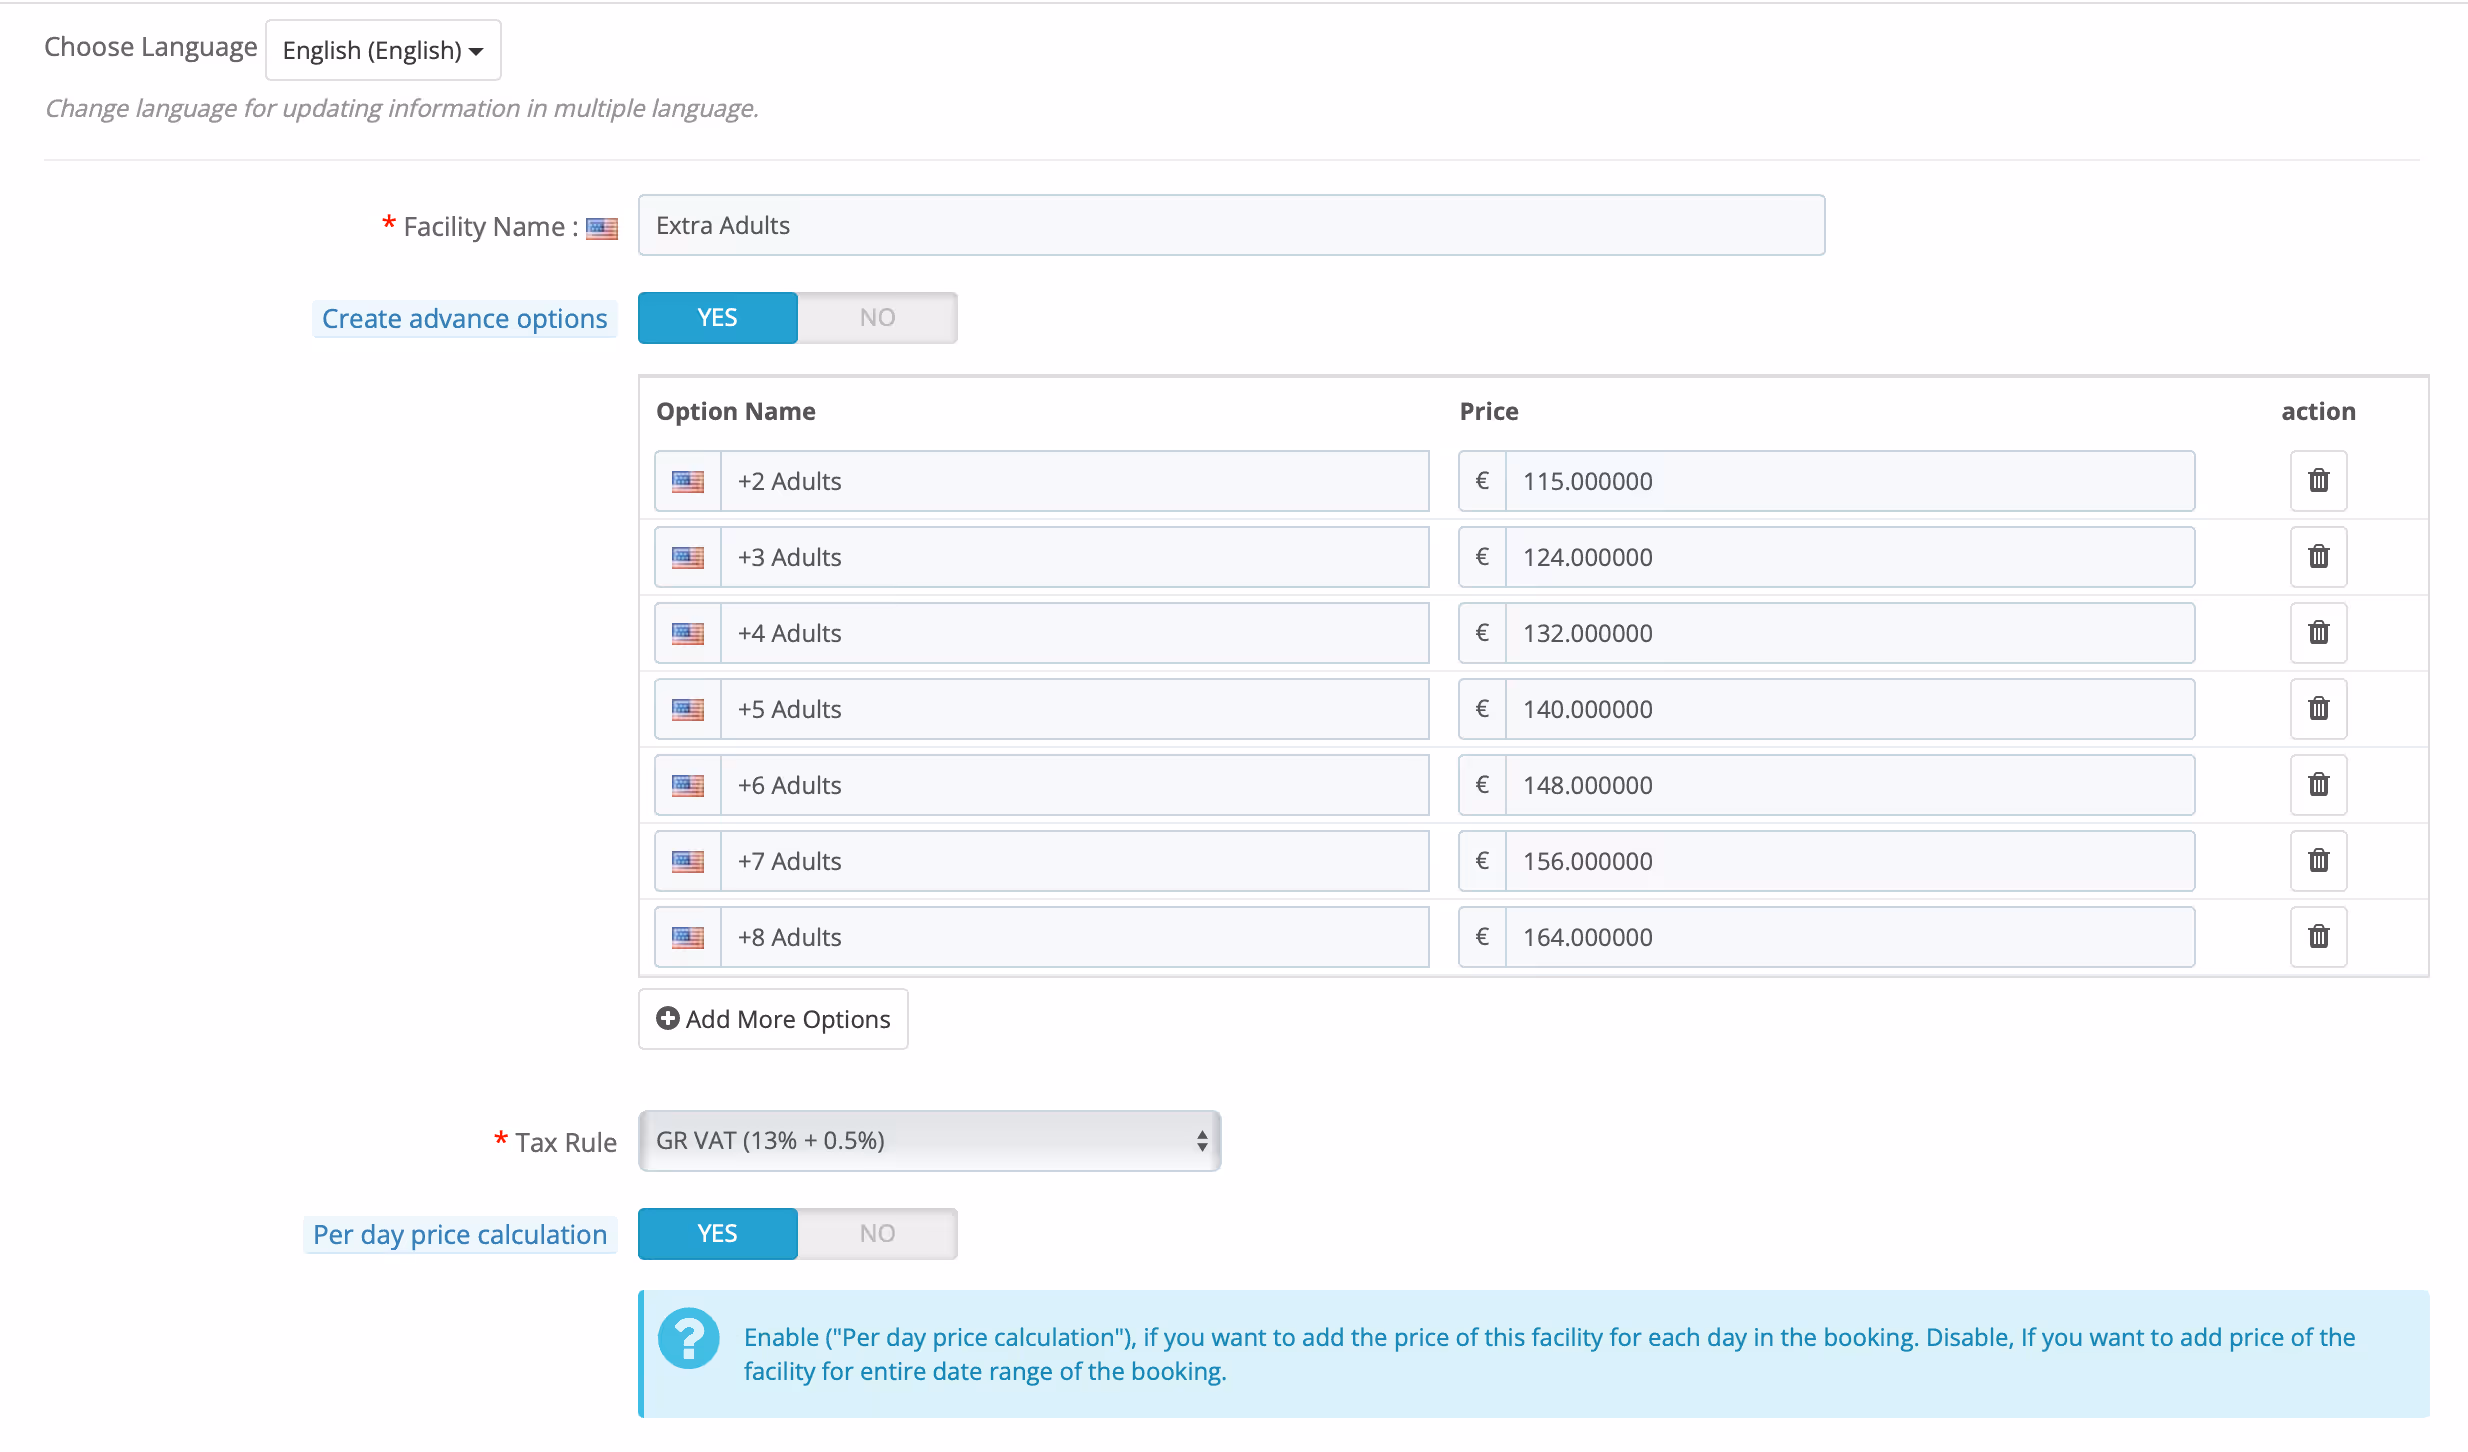
Additional Facilities
The seller can add and manage the various additional facilities provided by him through the additional facilities tab.
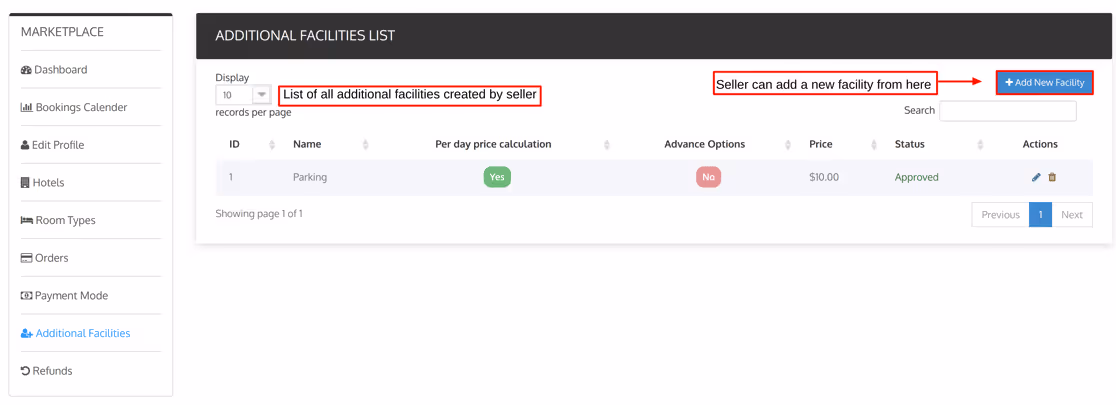
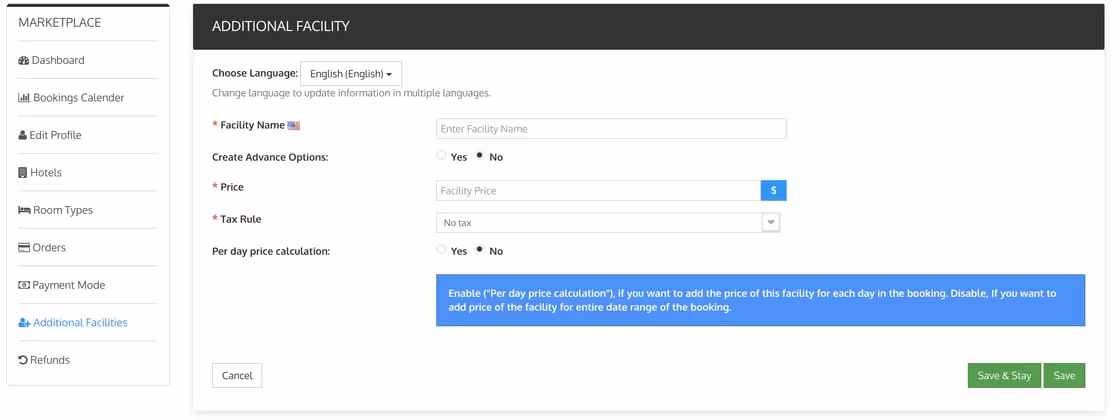
To create a new additional facility, the seller will first click on the ” add new facility” button.
Then add all the details about the additional facility such as name, price, tax rule, and price calculation method. This is how sellers can create new additional facilities.
After the seller has created the additional facility, it will go to admin for approval after which the seller can assign them to particular room types for booking.
If the admin has enabled the auto approval of the additional facilities.
Then the additional facility created by the seller will get approved automatically and the seller can add these facilities to a particular room type for booking.
Refunds
The seller can manage all the refund requests and refund rules through the refunds tab.
Refund Requests
In this section, the seller can view all the refund requests received by his guests. Through this section, he can manage his refund requests and provide his guests with partial or full refunds.

The seller can view the details of the refund by clicking on the view button. Once the seller clicks on the view button, a new page displays the customer and booking details.
Through the various options present on this page, the seller can easily update the refund status and process the refund request of the guests.

Refund Rules
The seller can view and add new refund rules from this section.
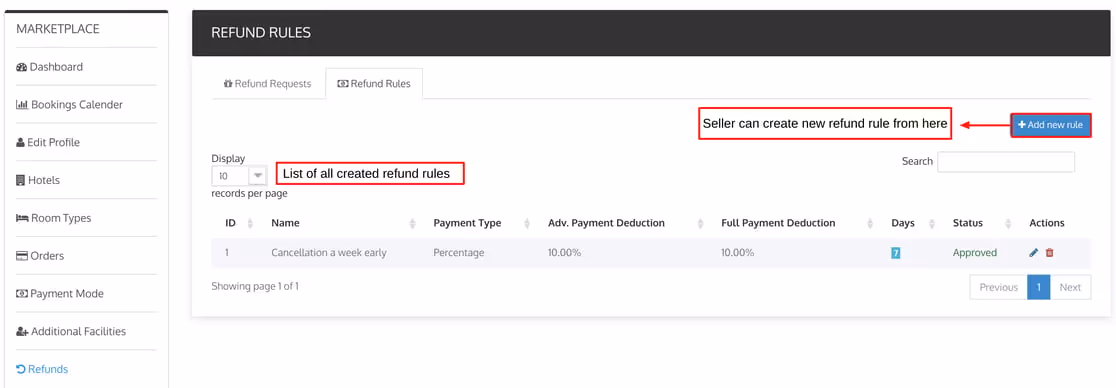
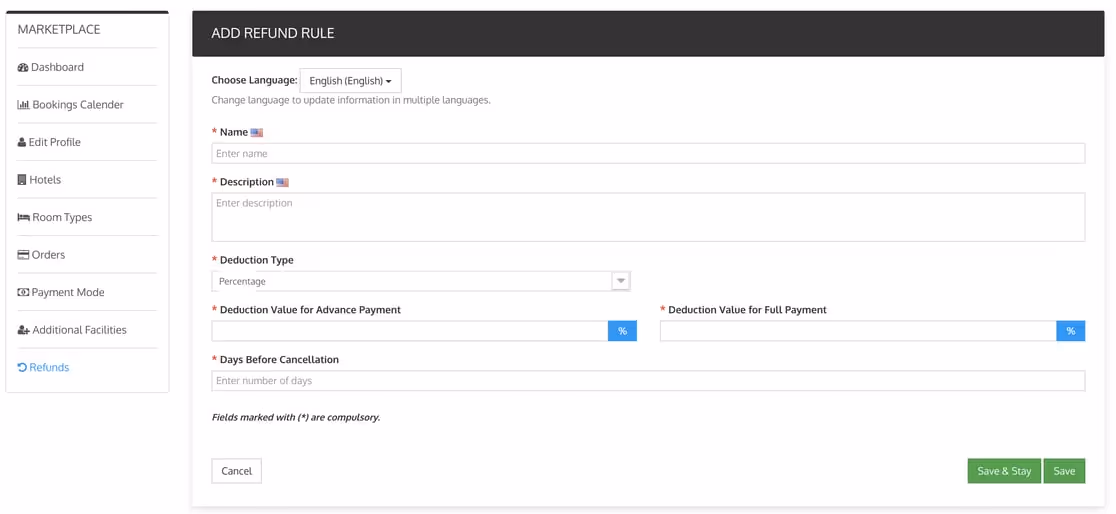
The seller can create a new refund rule by clicking on the ” Add new rule” Button.
Then the seller will add the necessary details of the refund rule and once the admin approves the created refund rule, the seller can apply the rule to his hotels.
Congratulations
Your booking system is now live and you can accept bookings.